Application of video extensometry to ASTM D 5656
Reliable, reproducible data is central to the design and delivery of cost-effective bonded assemblies.
Adhesive bonding is a critical part of the structural designer’s toolkit, whether components are metallic or composite. The availability of high-quality, reliable and reproducible data is central to the ability to design and deliver cost-effective bonded assemblies. Although standard test methods are available, those methods typically specify the use of data acquisition tools that were considered state-of-the-art at the time the method was established. It can be useful to consider the opportunities made available by re-envisioning established test methodologies, using more recently developed measurement technologies.
This column examines how the application of a video metrology technology can offer more effective measurements than conventional means within ASTM standards and extend the range of data available without any changes to the test specification. ASTM D 5656 is used here as an example of the advantages of the new technology, which can be applied across a range of both standard and novel test procedures.
Extensometry update
In the ASTM D 5656 test method, thick adherend lap shear samples are adhesively bonded, and a tensile load is applied to place the adhesive in shear. The use of thick, rigid adherends minimizes peel forces, ensuring that the test will obtain data on the shear stress/strain properties in the adhesive — the data useful when designing or analyzing adhesively bonded joints.
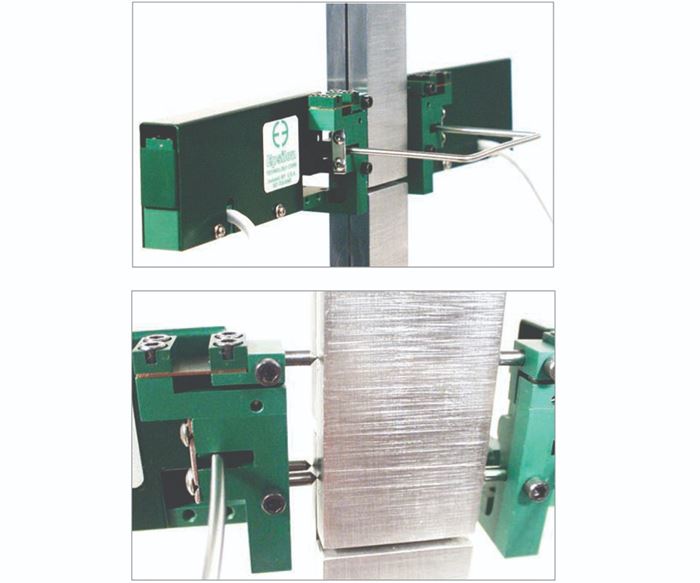
The current solution used to measure extensions on this specimen is the KGR extensometer, and it has been adopted as the standard by ASTM. The extensometer uses the conventional strain-gauged beam approach and is attached to the sample using either three or four pins, depending on the specific implementation.
The relative movement between the two plates of the thick adherend shear test fixture is then tracked during the test. Extensometers are attached to both edges of the specimen and the readings are averaged to give the reported strain. Problems have been reported with these extensometers in terms of slippage at the pin connections, the impact of any rotation on the reported strains, damage to the extensometers when samples fail with the extensometers attached, and the common issues of reliability and the potential for baseline drift with strain gauge systems.
The video metrology alternative
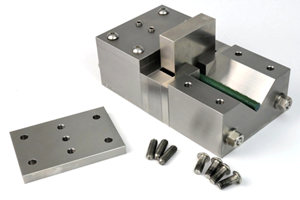
In place of the standard extensometer (Fig. 1), during a demonstration ASTM D 5656 test, a video metrology-equipped extensometer developed by Imetrum (Flax Bourton, UK) was used. Imetrum’s systems are designed to yield traceable data across most testing and monitoring requirements for materials, components, assemblies and structures. The system is fully commercial and routinely used to determine material properties, quality control, model verification, and to perform structural testing and in-service assessments. The system’s trademarked Video Gauge technology ensures that the system meets the most demanding requirements for strain, elongation, modulus and other measurements in tensile, compression, flex, shear and peel tests. The Universal Video Extensometer (UVX) can deliver resolutions to better than 3 microstrain and calibrate to unparalleled accuracies, with ISO 9513 class 0.5/ASTM E83 B-1, even at low strains and gauge lengths.
Under controlled laboratory conditions, the UVX system will track the x and y coordinates of a target box used to define the position of a feature in the video stream to a resolution of 1/200th of a pixel or better. This level of resolution makes the system effective in situations where conventional extensometric measurements are difficult because they are carried out
- on a very small scale.
- at very high temperature.
- on very delicate specimens.
- in high-speed testing.
- in complex loading regimes (such as those tested in ASTM D 5656).
- in remote sensing of large civil engineering structures.
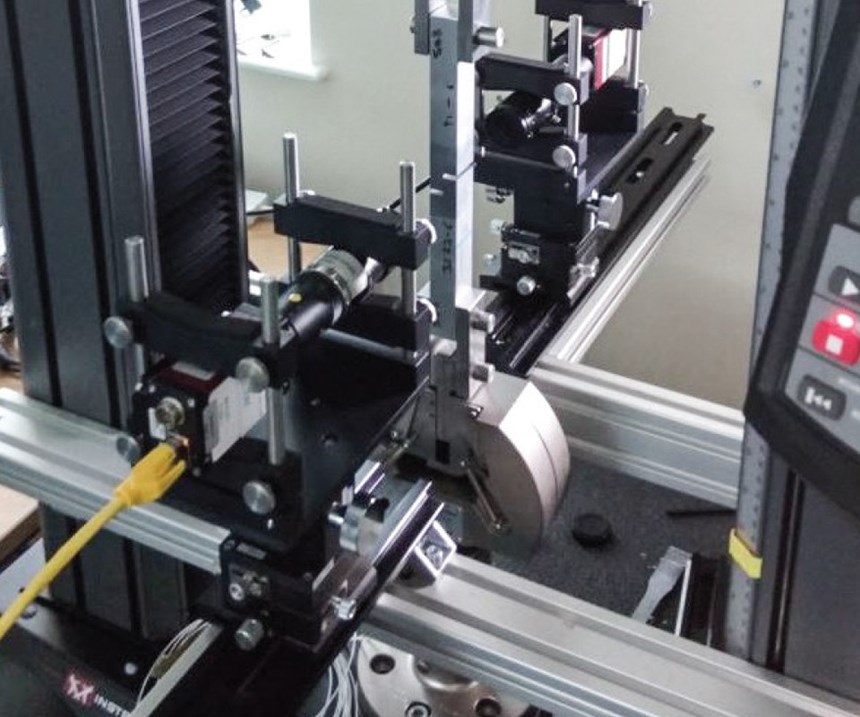
In this demonstration, two 5-megapixel cameras and suitable lenses were selected to maximize the adhesive bond line in camera view. The large number of pixels representing this bond line ensured a high measurement resolution. In this case, 0.1µm displacement resolution was achieved.
The cameras were positioned front and back and synchronized to replicate the setup of the KGR extensometer (Fig. 2). A measurement plane was calibrated, using the known dimension of the overlapping bondline for scale. This enabled extension measurements to be made in millimeters, in accordance with the standard. Measurement points were applied according to the positions defined in the ASTM standard.
Comparing test results
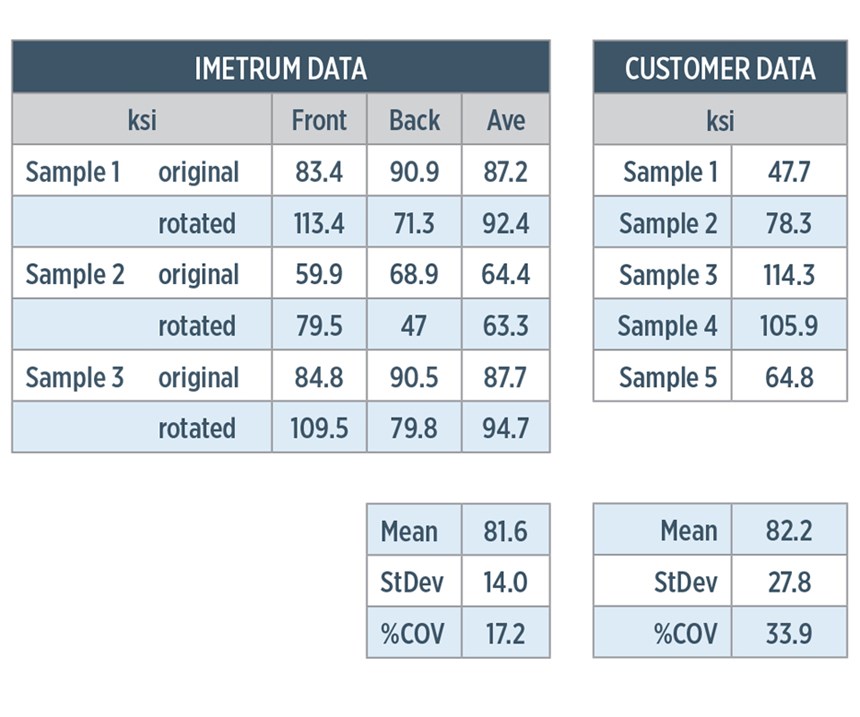
Test results were compared with data collected using a conventional extensometer (Fig. 3). The mean value of shear modulus (81.6 ksi) was found to be within 1% of KGR-determined data (82.2 ksi). Shear modulus determined using the KGR data had a standard deviation of 27.8%, but the shear modulus determined using the UVX data had a standard deviation of only 14.0%. Additional testing suggested that using six measurement points, rather than three, could potentially more than halve this uncertainty to 6%.
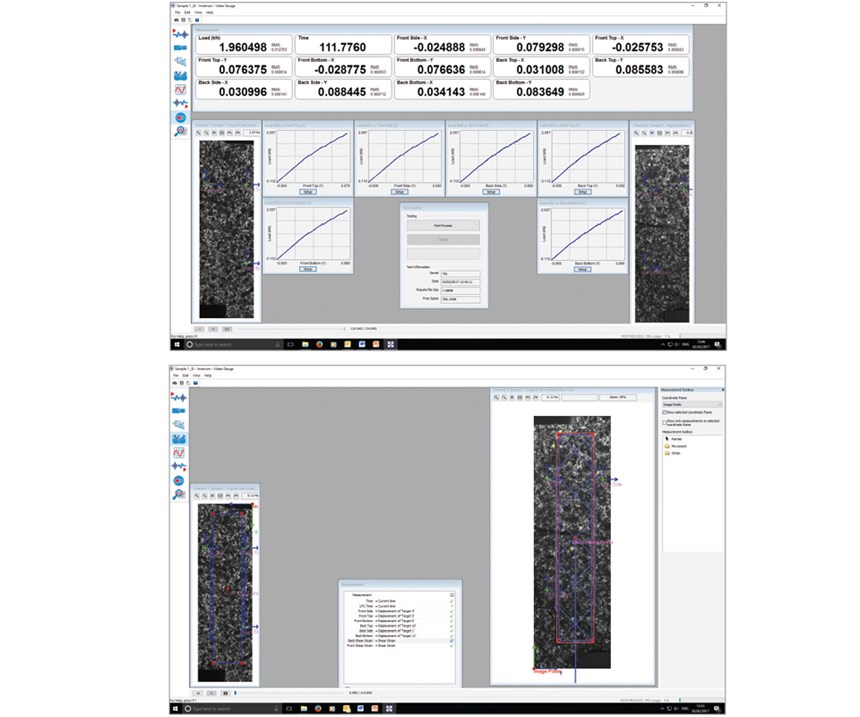
In addition to providing KGR equivalent point displacement data for manual calculation of the shear stress/shear strain curve (Fig. 4, top), the video extensometer can measure shear strain directly, using groups of targets. The shear strain gauge is shown in Fig. 4, bottom). The gauge can be extended to cover the entire bond length and aligned with the bond line for precise measurement. A sufficiently small field of view would allow the shear strain to be measured directly in the adhesive layer, avoiding uncertainty that comes from measuring on the adherends.
Although the current method, using a KGR, provides average shear strain between the adherends, it does not provide all the information that would be of benefit in a research environment. UVX can provide additional data, including changes in the thickness of the adhesive layer, relative rotations of the adherends, point-to-point differences in the shear strain in the adhesive layer, shear and tensile strains in the adherends and tracking of the development of cracks within the adhesive. The UVX technology enables a simpler, more robust and reliable approach to the capture of the basic shear strain, as required by ASTM D 5656. In addition, it allows all the rich data currently not captured to be recorded for in-depth analysis (Fig. 4).
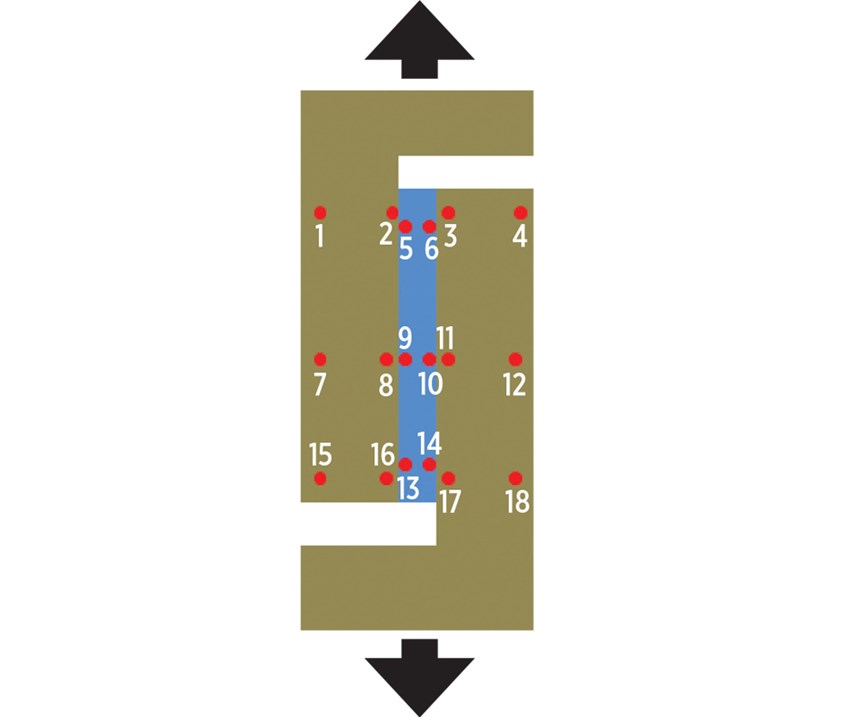
A total of 18 points were identified and measured (Fig. 5) yielding the following data:
- Shear strains between points 16 and 17 provide the basic functionality of the KGR extensometer.
- Tracking points 2 and 16 and points 3 and 17 allow rotation of the sample to be determined.
- Tracking points 3; 11 and 17; and 4, 12 and 17 allow the shear and tensile strains in the arms of the test fixture to be captured.
- Tracking points 5 and 6; 9 and 10; and 13 and 14 allows the strain in the adhesive to be measured directly.
- Tracking the displacements of points 2 and 3 or 16 and 17 allows any change in adhesive thickness to be captured.
The various relationships between these points can be tracked in real-time during the test and/or stored for post-process analysis.
More repeatable, reliable, applicable
In this demonstration, video-derived measurements were shown to give more repeatable results than a conventional KGR extensometer, while still following the rules outlined in the ASTM D 5656 standard. Potentially, this could allow for smaller specimen batches, leading to time and cost savings.
Subsequent testing demonstrated that even greater consistency could be achieved by using the UVX multi-point capabilities to track strain at multiple points along the bond line. Multiple measurements also can even out the variations in stiffness seen along the bond line, further improving repeatability.
A noncontact extensometry solution offers other benefits, such as removing the potential for device slippage on the specimen or device damage at failure. Furthermore, although the KGR extensometer was developed specifically for the ASTM D 5656 test, video metrology-equipped extensometers are more test-method agnostic. The UVX configuration used here can be employed to make measurements on other specimens and for other test method standards. UVX Flexi video extensometers, for example, are highly configurable with a wide choice of user-interchangeable camera and lens options, enabling a single system camera to be used for almost all material testing requirements. The UVX is designed for ease of use and fast throughput speeds and is ideal for batch testing.
About the author
Simon Jenkins is a chartered mechanical engineer, providing technical leadership and project management in manufacturing research to GKN Aerospace (Filton, UK). Previously an applications engineer for Imetrum (Flax Bourton, UK), he supported customers by performing dynamic measurements on test articles, ranging from sub-millimeter laboratory-scale coupons to bridges in service. Before coming to Imetrum, Jenkins spent 12 years at BAE Systems (Bristol, UK) working in materials research, with specialties in nonstandard mechanical testing, high-strain-rate testing and digital image correlation. He holds a Ph.D in mechanical engineering from Bristol University.
Related Content
Damage tolerance testing of sandwich composites: The sandwich flexure-after-impact (FAI) test
A second new ASTM-standardized test method assesses the damage tolerance of sandwich composites under flexural loading.
Read MoreComposite test methods (and specifications) for fiber-reinforced concrete structures
While initially focused on transitioning existing standards published by the American Concrete Institute, the relatively new ASTM Subcommittee D30.10 is developing new standardized test methods and material specifications for FRP composites.
Read MoreTesting to support composite bolted joint analysis
An overview of ASTM Standard Guide D8509, and its coupon-level mechanical testing of design properties for analyzing composite bolted joints.
Read MoreNumerical tool with mean stress correction demonstrated for fatigue life estimation of thermoplastic composites
To aid design of fatigue-resistant structures, Econ Engineering has developed an algorithm to evaluate ply-based cyclic stiffness degradation combined with an FE failure check, validated for a CF/PAEK pressure vessel.
Read MoreRead Next
“Structured air” TPS safeguards composite structures
Powered by an 85% air/15% pure polyimide aerogel, Blueshift’s novel material system protects structures during transient thermal events from -200°C to beyond 2400°C for rockets, battery boxes and more.
Read MorePlant tour: Daher Shap’in TechCenter and composites production plant, Saint-Aignan-de-Grandlieu, France
Co-located R&D and production advance OOA thermosets, thermoplastics, welding, recycling and digital technologies for faster processing and certification of lighter, more sustainable composites.
Read MoreAll-recycled, needle-punched nonwoven CFRP slashes carbon footprint of Formula 2 seat
Dallara and Tenowo collaborate to produce a race-ready Formula 2 seat using recycled carbon fiber, reducing CO2 emissions by 97.5% compared to virgin materials.
Read More
