Damage tolerance testing of composites
Not standardized until 2005, ASTM D 7137 is still commonly referred to as the Boeing CAI test.
Share
Damage tolerance refers to the capability of a damaged composite laminate or structure to maintain its original strength and stiffness. Typically, the damage is produced by drop-weight impacting, which can cause extensive internal damage that is difficult to detect by visual inspection. Damage tolerance testing of composites most often is performed under compression loading because compression strengths are lower than tension strengths and, therefore, more critical in many designs. Additionally, impact damage typically has a greater effect on the compression strength. Compression-after-impact (CAI) tests thus are widely used for assessing composite damage tolerance. For applications in which other loadings are critical, however, other types of tests may be used. For example, damage tolerance of composite pressure vessels is better assessed using tension-loaded specimens following impact.
As discussed in my October 2016 column, damage tolerance testing follows the assessment of damage resistance, which focuses on the ability of a composite material or structure to resist the formation of damage.
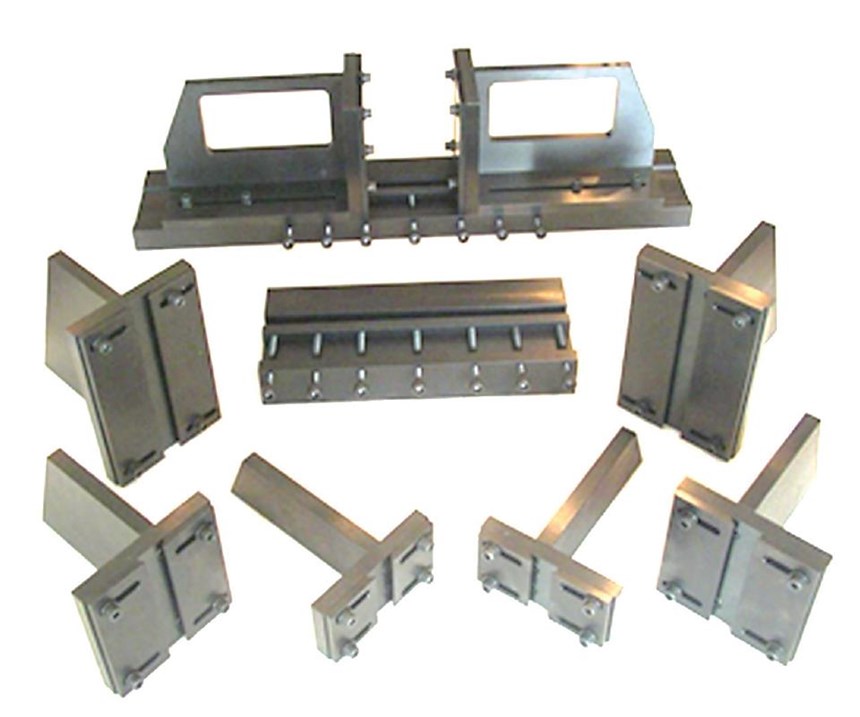
Currently the most widely used standard test method for damage tolerance of composites is ASTM D 71371. Not standardized by ASTM until 2005, it originated as a Boeing standard (BSS-72602) in 1982, and is still commonly referred to as the Boeing CAI test. In this test, a 100-mm wide by 4-6mm long flat composite specimen is used, with a suggested thickness range of 4-6 mm. Although any balanced and symmetric laminate is acceptable, the use of [45°/90°/-45°/0°]ns quasi-isotropic laminates is suggested for use in material comparisons. The test fixture (Fig. 1) end loads the specimen while supporting it along all four edges to resist buckling. Along the top- and bottom-loaded specimen edges, 8-mm thick flat-face supports prevent both end rotations and end brooming. Along the unloaded sides of the specimen, knife-edge supports prevent out-of-plane deformation but allow rotation. To ensure proper alignment, four axial strain gages may be bonded back-to-back near the bottom outer corners of the specimen and monitored during loading. When an adjustable hemispherical platen is used, minor adjustments can be made to minimize differences in axial strain readings under low load levels to improve alignment during subsequent compression testing to specimen failure. The compression-after-impact strength is calculated as the maximum load divided by the cross-sectional area of the specimen.
The original Boeing CAI test method was used primarily to compare the damage tolerance of composite materials. Meaningful material comparisons, however, require consistent laminate thickness and ply stacking. Additionally, drop-weight impacting to produce the damage must be performed with consistent impactor shape, impact energy and specimen support conditions, because these considerations affect the damage state produced. Since the CAI strength is highly dependent on all of these variables, it is considered a structural rather than a material property.
Although ASTM D 7137 cautions against the use of test results in establishing design allowables, the CAI strengths obtained are often used to determine the reductions in maximum compression stress or strain due to impact damage in actual composite structures.When that is the case, the composite laminate used in the test specimen is selected to represent the laminate to be used in the finished part. Similarly, the impactor shape, impact energy and support conditions used when impacting the specimen may be selected to represent impact threats that the finished part will face in service.
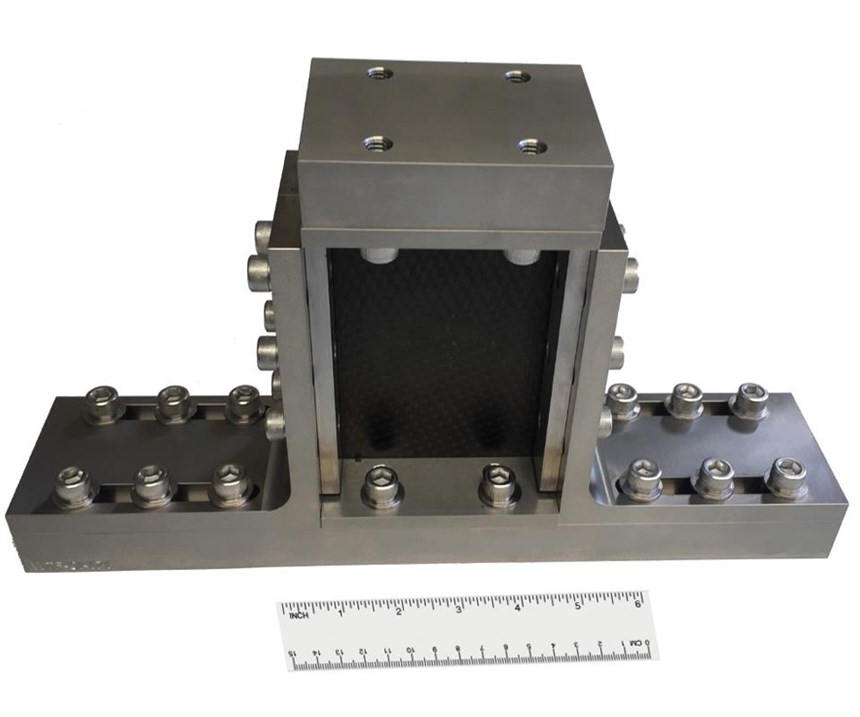
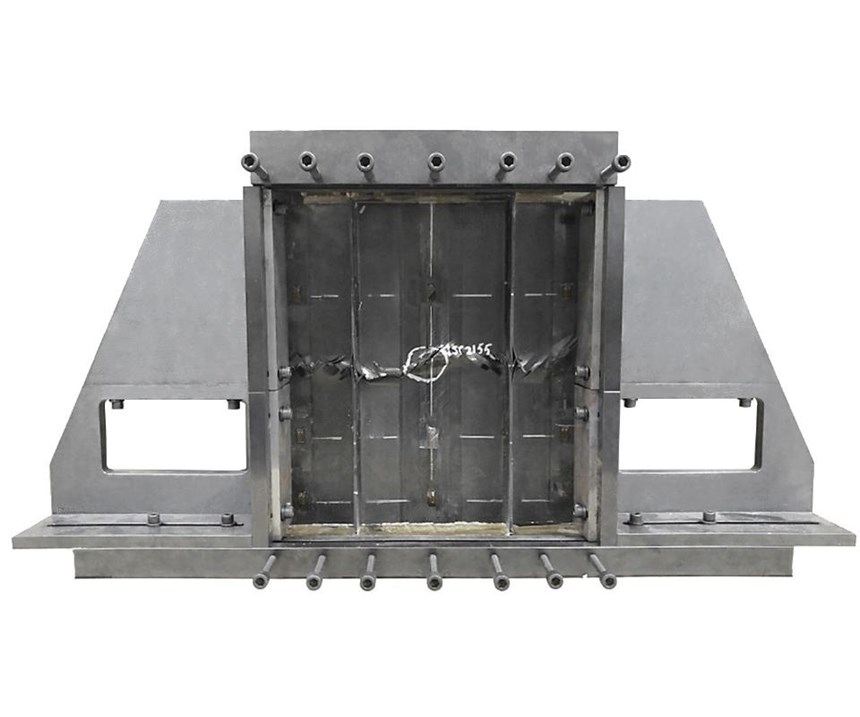
Another common practice is to use impact energy levels that produce barely visible impact damage (BVID) that’s difficult to detect during a visual inspection of the composite structure. In contrast, test specimen size has often remained at the original 100- by 150-mm dimensions regardless of the intended application. For that reason, questions persist about whether or not CAI strengths obtained using this relatively small specimen can be applied to larger parts or more complex geometries. It’s important to note that the 100- by 150-mm specimen size was selected to produce sufficient reductions in compression strength for use in material comparisons yet prevent the impact damage from extending beyond one half of the specimen width. As a result, the Boeing CAI test tends to provide a conservative assessment of damage tolerance when applied to larger structures. The reason: the impact damage affects a smaller percentage of the cross-sectional area in a larger structure and, thus, produces a smaller reduction in compression strength. To better represent actual composite structures, larger CAI test specimens may be used. Recent years have seen an increased interest in the use of modular CAI test fixtures (Fig. 2), which can accommodate a range of specimen sizes to better represent the parts used in intended applications. However, all such tests are typically considered as the base level of a building-block approach to assessing damage tolerance of composite structures. This approach involves testing reduced numbers of larger, more complex test articles that better represent the actual structure at the element, subcomponent, component and full-scale levels. Progressing up one level to element level testing involves the incorporation of design features, such as stiffeners, cut-outs and curvatures. As an example, Fig. 3 shows a three-stiffener panel subjected to CAI testing.
With the use of a damage tolerance building-block approach comes an interest in developing relationships for scaling test results to reduce testing requirements. However, results to date suggest that, due to the complexity of the damage states produced and the variety of factors that affect damage formation and the resulting damage tolerance, CAI strengths from test specimens do not scale up to larger parts. Additionally, although the use of numerical analyses currently is of great interest for scaling results from specimen- and element-level tests to full-scale structures, replacing physical testing with numerical analyses is simply not possible at the present. Numerical modeling currently is of limited use for assessing damage tolerance due to difficulties associated with a) the complexity of the damage states produced by impact, b) predicting the formation of the impact damage and c) predicting damage progressions and strength reductions resulting from impact damage. Composite damage assessment, therefore, still relies heavily on physical testing performed following the previously noted building-block approach at multiple levels of test article size and complexity.
References
1 ASTM D7137-12, “Compressive Residual Strength Properties of Damaged Polymer Matrix Composite Plates,” ASTM International (W. Conshohocken, PA.), 2012 (originally published 2005).
2 Boeing Specification Support Standard BSS 7260, “Advanced Composite Compression Tests,” The Boeing Co. (Seattle, WA), revised December 1988 (originally issued February 1982).
Related Content
Jeep all-composite roof receivers achieve steel performance at low mass
Ultrashort carbon fiber/PPA replaces steel on rooftop brackets to hold Jeep soft tops, hardtops.
Read MoreNine factors to consider when designing composites cure tooling
Gary Bond discusses the common pitfalls and compromises when designing good cure tooling and their holistic significance for a robust composite production process.
Read MoreThe basics of composite drawing interpretation
Knowing the fundamentals for reading drawings — including master ply tables, ply definition diagrams and more — lays a foundation for proper composite design evaluation.
Read MoreActive core molding: A new way to make composite parts
Koridion expandable material is combined with induction-heated molds to make high-quality, complex-shaped parts in minutes with 40% less material and 90% less energy, unlocking new possibilities in design and production.
Read MoreRead Next
All-recycled, needle-punched nonwoven CFRP slashes carbon footprint of Formula 2 seat
Dallara and Tenowo collaborate to produce a race-ready Formula 2 seat using recycled carbon fiber, reducing CO2 emissions by 97.5% compared to virgin materials.
Read MorePlant tour: Daher Shap’in TechCenter and composites production plant, Saint-Aignan-de-Grandlieu, France
Co-located R&D and production advance OOA thermosets, thermoplastics, welding, recycling and digital technologies for faster processing and certification of lighter, more sustainable composites.
Read MoreVIDEO: High-volume processing for fiberglass components
Cannon Ergos, a company specializing in high-ton presses and equipment for composites fabrication and plastics processing, displayed automotive and industrial components at CAMX 2024.
Read More




.jpg;maxWidth=300;quality=90)

