Volume Graphics CT software update detects and corrects design flaws and manufacturability issues
Version update for data analysis software suite improves usability, speed and accuracy of non-destructive testing, analysis and geometry repair of parts from injection molding, casting or 3D printing.
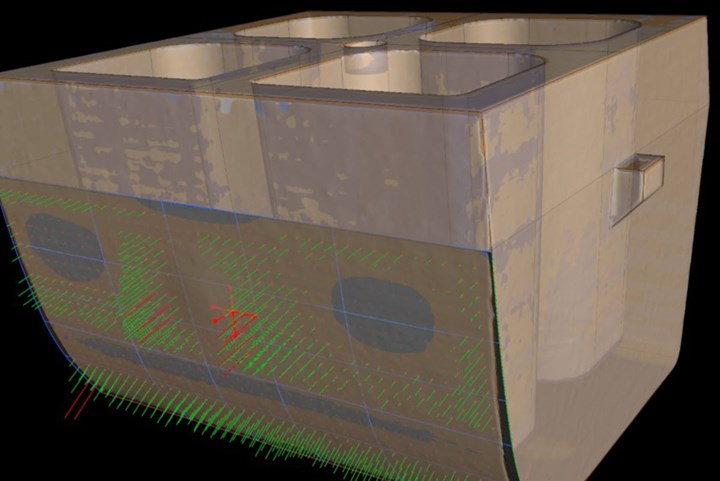
Fig. 1. Manufacturing geometry correlation module. All photo credit: Volume Graphics
The latest version of Volume Graphics’ (Charlotte, N.C., U.S.) high-end industrial computed tomography (CT) data analysis software suite, version 3.5, brings enhanced capabilities to manufacturers looking for better ways to inspect parts and improve designs. According to the company, the non-destructive part evaluation software can interpret CT data from scans of almost any part and material.
Version 3.5 provides more powerful automated design-geometry
adjustment and repair tools that can be used to correct and/or offset issues
that stem from the manufacturing process itself, Volume Graphics says. Moldmakers, casting shops and additive manufacturing (AM) providers alike are said to be able to employ the software to detect and visualize material and/or design defects or distortions, and then employ sophisticated capabilities to correct their CAD designs, compare values against nominal limits and ensure that final part quality meets applicable industry standards.
The company highlights version 3.5’s completely reworked manufacturing geometry correction module (Fig. 1). This software module, says Volume Graphics, benefits all those who work with some kind of mold (i.e., injection molders or casters). Enhancements in usability, with continuous updating and feedback on quality, give the CAD designer valuable information that can be used to improve manufacturability. Filtering out points that can cause erroneous compensation results, the software is able to fine-tune surface fitting and provide compensations that are within tolerances, enabling the user to immediately see if their design changes are compatible with moldmaking.
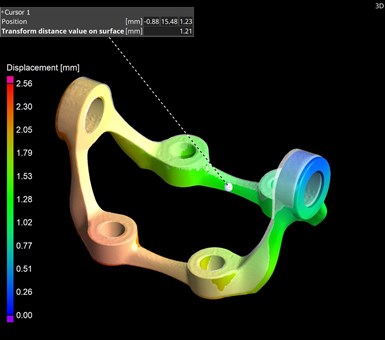
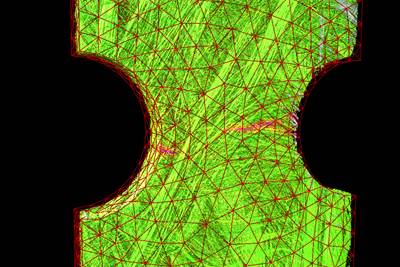
Fig 2. Enhanced mesh compensation.
Enhanced mesh compensation is another highlighted feature (Fig. 2). For those companies working in simulation and AM/3D printing, Volume Graphics notes that this module now provides easier navigation and understanding of the relationships between elements for better interpretation of part warpage, deformation and displacement, as well as automatically compensates designs to correct for such deviations from manufacturing intent. Mesh updating is said to be ten times faster, with improved results when scan and reference objects differ greatly in size or show other significant deviations. Further, there are a greater number of control points for more granular and accurate results.
In the case of lattice structures and other complex geometries, a uniform control-point placement function ensures full analysis of a design. The software can also shorten the 3D-print-and-test process by automatically running two sequential design-compensation results to move a design for AM closer to nominal before the first print.
The company also points to version 3.5’s new porosity and inclusion analysis of castings (Fig. 3). It’s noted that this is one of the most significant features in the version update: CT scans of cast parts can now be inspected for porosity and compliance with Reference Sheet P 203 of the Federation of German Foundry Industry (BDG). With the help of the BDG P 203 porosity key, users can reportedly perform a 3D evaluation of detected volume deficits both in the complete casting and in freely defined sub-areas, such as functional areas with special attributes. The software enables inspection of multiple, different regions of interest in a part to see if porosity is within tolerances and whether there are any post-machining issues in the finished part. The data from this analysis is then ready for Q-DAS process control.
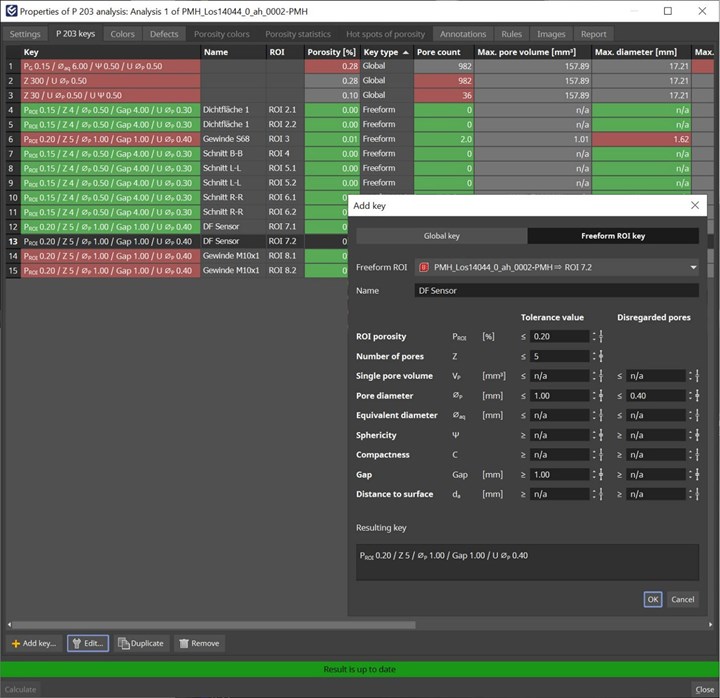
Fig. 3. New porosity and inclusion analysis of castings.
Other enhancements in version 3.5 strengthen existing functionalities that
support science, R&D medical device development and other industries in
addition to automotive, aerospace and defense. Among these, says Volume Graphics, is advanced reporting, which is now more user-friendly and fully integrated with viewing. The nominal/actual comparison module has also been made more user-friendly with easy-to-understand visualization of deviations of scanned objects from their reference data sets. A full list of all new developments for the CT data analysis software suite includes VGSTUDIO MAX, VGSTUDIO, VGMETROLOGY, VGinLINE and myVGL.
Related Content
Adaptive composite elements for building facades exhibited at JEC World 2023
University of Stuttgart institutes use carbon and glass fiber composites, robotic fabrication, biomimetic design and digial twin/control to demonstrate adaptive facade elements for future buildings.
Read MoreUltra high-rate composite deposition system trials to surpass layup targets
The NCC, alongside partners Loop Technology, Coriolis and Güdel, are on track to deliver dry fiber deposition rates exceeding 350 kilograms/hour, seven times more than standard aerospace rates.
Read MoreAerotech Academy Puglia is inaugurated at Leonardo Aerospace site in Grottaglie, Italy
Joining the Leonardo MaTeRIA Lab and Joint Lab with Syensqo, this aerostructures training course will be 75% materials science and structural design/analysis, 25% digital transformation and AI.
Read MorePlant tour: Sekisui Aerospace, Orange City, Iowa, Renton and Sumner, Wash., U.S.
Veteran composites sites use kaizen and innovation culture to expand thermoplastic serial production, 4.0 digitization and new technology for diversified new markets.
Read MoreRead Next
Part 2: Applying CT scan data analysis and visualization to composites
Advanced CT-scan analyses can offer deep insight into challenges faced when examining novel composites and hybrid material behavior or performing quality and certification testing. Part two of a two-part series.
Read MoreApplying CT scan data analysis and visualization to composites
Imaging and analysis via computed tomography (CT) has potential for certifiable safety and business sustainability and could be key for interior inspections of composite parts. Part 1 of a two-part series.
Read MoreAll-recycled, needle-punched nonwoven CFRP slashes carbon footprint of Formula 2 seat
Dallara and Tenowo collaborate to produce a race-ready Formula 2 seat using recycled carbon fiber, reducing CO2 emissions by 97.5% compared to virgin materials.
Read More






.jpg;maxWidth=300;quality=90)


