Laser encoder enables highly accurate cutting of critical wingskins
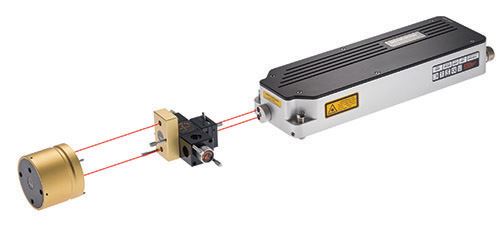
To ensure machined part dimensional accuracy on Flow International Corp.’s (Kent, Wash.) new Composites Machining Center’s (CMC) gantry design, in x-axis lengths of 6 to 50m (19.5 to 162.5 ft), one of the keys is Renishaw plc’s (Gloucestershire, U.K.) HS10/HS20 laser encoder.
Share
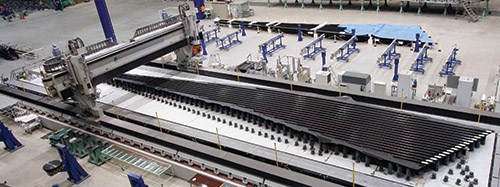
Flow International Corp.’s (Kent, Wash.) new Composites Machining Center’s (CMC) gantry design, in x-axis lengths of 6 to 50m (19.5 to 162.5 ft), carries two rams on a single gantry, with a 5-axis wrist on each ram. One ram is for ultrahigh-pressure waterjet cutting and the other handles conventional high-speed routing. Designed to do all the finish machining on, for example, a wingskin, it handles trimming, drilling, routing, surface milling, marking and inspection, in one setup. Parts reportedly leave the machine ready for assembly.
“Reduced variation in parts is an industry-wide goal,” explains Mark Saberton, Flow’s director of aerospace. “The OEMs want parts to meet tolerances when they arrive on the assembly floor, rather than using fixtures and shims to bring parts into assembly tolerance. Weight is also an issue — less variance in parts and fewer shims ensures better control of the aircraft’s final weight.”
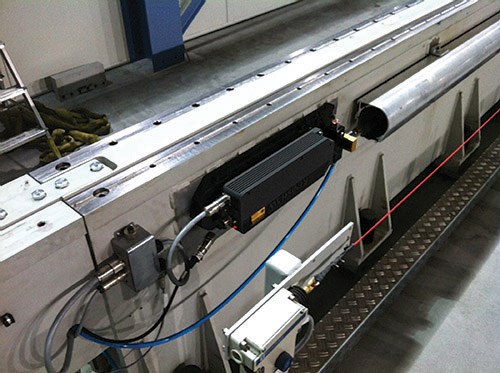
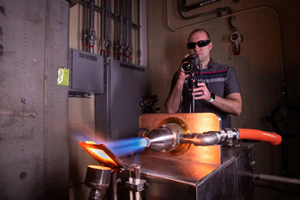
One of the keys to meeting tight tolerances during machining cycles that can last a week is Renishaw plc’s (Gloucestershire, U.K.) HS10/HS20 laser encoder, mounted on the Flow CMC (see photo, top right). With the precision of a laser interferometer, the encoder and its companion RCU10 real-time compensation unit reportedly deliver part-per-million positioning accuracy on the CMC’s x-axis, eliminating variables for which users previously had to compensate when they were limited to the traditional glass or tape scales. Both encoders use the same laser interferometry technology now used for linear measurement and error compensation by machine calibration specialists, with the exception that these are permanent fixtures, replacing glass/tape scales. “A physical scale 30 to 50m long ... makes thermal compensation much more difficult,” explains Todd Fuchs, senior electrical project engineer at Flow. “The temperature differences ... over a 40m [131.2-ft] length during a 130-hour machining cycle can be relatively extreme, even in an air-conditioned plant,” he explains. “The laser encoder is the easiest way to obtain accurate feedback on such a long axis.”
Because the CMC features a rack-and-pinion drive on each side of its gantry, the machine uses split x-axis feedback, employing a laser on each side for positioning. The lasers are located near the drivetrain, in a duct that is purged with clean, dry air to ensure stable measurements and to protect the device from airborne debris, which could “break” the laser beam. Unlike a tape or glass scale, the laser encoder introduces no short-term errors that can “stack up” on long axes. Its 1-m/sec (3.28-ft/sec) measuring speed is said to keep pace with fast-moving machine tools.
The HS20 is sealed and hard-anodized to protect it in harsh environments. Equipped with the Renishaw long-range optics kit and companion RCU10 system, the laser forms a noncontact, interferometric-based encoder system for high accuracy (1 µm/m) linear position feedback on axes up to 60m long. It works with any CNC system that can read A quad B signals in RS-422 digital format. The RCU10 also compensates for the refractive index of air (which affects light transmission) using air pressure and temperature sensors; and it gauges and then compensates for thermal expansion of the machine and workpiece using material-temperature sensors. Advanced algorithms enable it to perform real-time compensation, adjusting the encoder count from the laser head, based on sensor data. “Our x-axis repeatability spec for a 40m gantry is 0.0381 mm [0.0015 inch], essentially equal to the laser interferometer used to calibrate the machine,” claims Fuchs.
X-axis positioning precision is also a factor during part probing, which is vital to the cutting process. The CMC’s Renishaw RMP60 touch probe locates the part during setup and then confirms the part’s finished dimensions after machining. The compact probe can access and measure any point on the part that the machine head can reach. Its “frequency-hopping spread spectrum” (FHSS) radio signal transmission allows multiple probe systems and other industrial equipment to coexist in “noisy” industrial environments — an increasingly important feature as wireless and Bluetooth communications proliferate.
Such extreme concern for accuracy is essential: “Some of these parts, such as wingskins, are worth nearly $1 million before machining,” Fuchs stresses. “When they come to the machine, they are seldom an exact match to the CAD model, so we probe extensively and do a lot of best-fit calculations prior to machining.”
Laser-equipped Flow CMCs are al-ready in use by Airbus partners.
Related Content
The future of quartz and oxide fibers at Saint-Gobain Advanced Ceramic Composites
New business builds on 100-year legacy in quartz, prepares for growth, while starting production of oxide fibers to meet increased demand for CMC by aerospace and industrial sectors.
Read MoreSRI advances CMC for solar, renewable energy and industry
U.S. research institute advances “infiltration-free” process for improved performance, durability and affordability of materials able to withstand highly corrosive environments at temperatures beyond 700°C.
Read MoreGE Aerospace awarded demonstration contract for NASA HyTEC project
Turbofan engine small core technology development with CMC-coated components targets enhanced fuel efficiency in single-aisle aircraft by mid-2030s.
Read MoreDITF Denkendorf advances sustainable carbon fibers, oxide fibers for CMC and more
The German Institutes of Textile and Fiber Research are targeting more sustainable carbon fiber via low-pressure stabilization and bio-based precursors, and working with Saint-Gobain to commercialize oxide ceramic fibers for CMC.
Read MoreRead Next
Plant tour: Daher Shap’in TechCenter and composites production plant, Saint-Aignan-de-Grandlieu, France
Co-located R&D and production advance OOA thermosets, thermoplastics, welding, recycling and digital technologies for faster processing and certification of lighter, more sustainable composites.
Read MoreVIDEO: High-volume processing for fiberglass components
Cannon Ergos, a company specializing in high-ton presses and equipment for composites fabrication and plastics processing, displayed automotive and industrial components at CAMX 2024.
Read MoreAll-recycled, needle-punched nonwoven CFRP slashes carbon footprint of Formula 2 seat
Dallara and Tenowo collaborate to produce a race-ready Formula 2 seat using recycled carbon fiber, reducing CO2 emissions by 97.5% compared to virgin materials.
Read More

