Share
Read Next
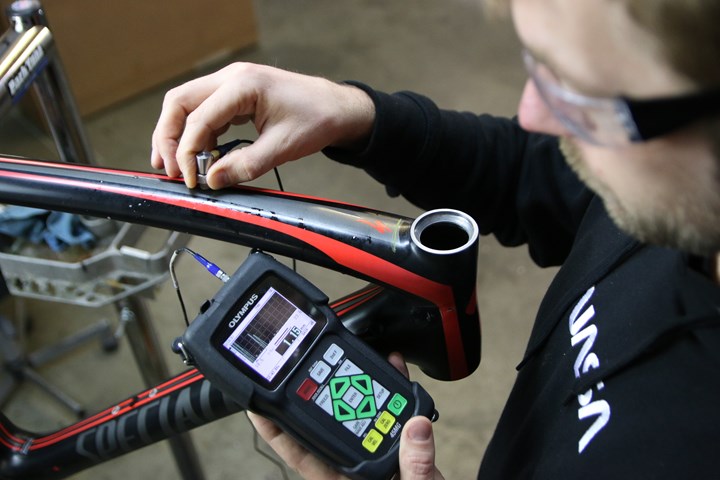
Shawn Small, owner and chief engineer of Ruckus Composites, displays an A-scan reading on the 45MG thickness gage while conducting an ultrasound inspection on a carbon fiber bicycle frame. This reading displays the amount of received ultrasonic energy as a function of time. Source | Olympus
An undetected crack in a carbon fiber bicycle frame or component could present a large catastrophic liability to a cyclist, leading to potential injuries. Despite this, according to carbon fiber inspection and specialty repair shop Ruckus Composites (Portland, Ore., U.S.), a carbon fiber bicycle frame is one of the best bike investments a cyclist can make, due to the light weight, comfortable design, long life and repairability of carbon fiber bicycles.
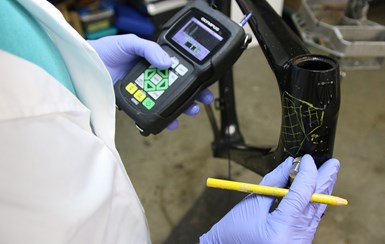
Ruckus Composites’ technicians use an Olympus gage to map out damaged areas of a bike frame. Source | Olympus
Ruckus Composites has evaluated more than 13,000 carbon fiber bicycles and repaired more than 6,000 since it opened in 2008, and also works with professional racing teams and bicycle shops all over the world. About four years ago, the shop’s owner and chief engineer, Shawn Small, invested in an Olympus (Waltham, Mass., U.S.) 45MG ultrasonic thickness gage for high-tech carbon fiber inspection, investigation and quality control. According to Olympus, Ruckus Composites’ inspection and repair process begins with using the Olympus gage for ultrasound scanning and damage mapping.
The nondestructive instrument is used to detect internal delamination; it can “see” the internal structure of the constructed composite material layers of a bicycle frame without the need to physically cut into the frame. According to Olympus, the 45MG ultrasonic thickness gage works by precisely measuring how long it takes for a sound pulse generated by an ultrasonic transducer to travel through one side of a material. In composite materials, sound energy scatters from individual grain boundaries between fibers within the composite. The instrument is said to be able to detect irregular scatter patterns in the material and signals this back to the operator.
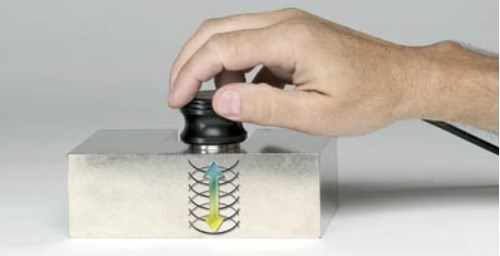
Ultrasound gages work by measuring how long it takes for a sound pulse generated by a small probe (transducer) to travel through a test piece and reflect back from the inside surface or far wall. Source | Olympus
“We push our Olympus 45MG to the limits; the device has paid for itself,” Small says. “The 45MG has become a staple to our daily business services.”
Small adds that after using the gage to map out the damaged areas of the bicycle, Ruckus Composites then designs a tapered composite repair plan. The damaged carbon fiber is machined off of the frame and new carbon fiber is applied based on the team’s layup schedule. The structure is vacuum bagged and oven cured, and then the paint and graphics are restored in-house, Small says.
The Olympus gage, Small says, helps Ruckus Composites ensure the quality of its service based on its ability to show the structural integrity invisible to the human eye, and is a top benefit and helps them ensure quality service. He adds that the 45MG thickness gage is also easy to use and portable.
“It’s shocking how little visible damage the bike could show,” Small says. “We use the 45MG to evaluate the structural integrity of the composite structure. It also allows us to accurately map out our composite repair process. This helps us ensure the quality of our service work. For example, we can scan the bike in an undamaged area for comparison to determine the laminate thickness. We then use this data to inform how much material our lay-up technician needs to apply to the damage area.”
Related Content
Repurposing wind blades as functional community art pieces
Ohio-based Canvus Inc. upcycles fiberglass wind blades, car tires and post-consumer plastics to create outdoor furniture that amplifies sustainability messages in community spaces.
Read MoreRunning shoe insoles get a lift with thermoplastic fiberglass tapes
FlexSpring insoles take advantage of unidirectional, continuous fiberglass and thermoplastics to enable next-level performance for the everyday runner.
Read MoreSyensqo provides PARA resin for Artiphon musical instrument
Artiphon has chosen Syensqo’s Ixef PARA fiber-filled resin in the production of Chorda, its custom handheld electronic musical instrument.
Read MoreGlass fiber-reinforced Akulon RePurposed recyclate enables Ahrend sustainable office chair
Envalior 30% glass fiber-reinforced Akulon RePurposed material helps Ahrend achieve lighter task chair with closed-loop value chain and reduced emissions.
Read MoreRead Next
Flaw detector includes new features to improve inspection workflow
Designed for pressure vessels and pipes, Olympus’s OmniScan X3 flaw detector is said to combine the tools needed for efficient phased array ultrasonic testing (PAUT) inspections.
Read MoreAll-recycled, needle-punched nonwoven CFRP slashes carbon footprint of Formula 2 seat
Dallara and Tenowo collaborate to produce a race-ready Formula 2 seat using recycled carbon fiber, reducing CO2 emissions by 97.5% compared to virgin materials.
Read MorePlant tour: Daher Shap’in TechCenter and composites production plant, Saint-Aignan-de-Grandlieu, France
Co-located R&D and production advance OOA thermosets, thermoplastics, welding, recycling and digital technologies for faster processing and certification of lighter, more sustainable composites.
Read More

.jpg;width=70;height=70;mode=crop)
