Automated, in-situ inspection a necessity for next-gen aerospace
Inline inspection technologies continue to evolve with the aim of providing faster and more accurate part inspection.
It may go without saying, but the continued viability of composites in commercial aircraft programs depends on reducing costs and improving production rates. Automation of production processes, such as automated fiber placement (AFP) and automated tape laying (ATL), improves speed and efficiency, but the need for careful, often manual, visual inspection has been a common time constraint. Just how much time is added to the overall production time by manual inspection? Accounts vary from 30 percent on the low end to more than 60 percent, as reported in a paper presented several years ago by Robert Harper of Fives Cincinnati (Hebron, Ky., U.S.) and Allen Halbritter of Boeing (Chicago, Ill., U.S.). So, though variable, the time penalty is significant.
In recent years, numerous companies have been working to develop automated inspection technologies that can keep up with automated production. Such efforts include inspection systems from companies like Electroimpact Inc. (Mukilteo, Wash., U.S.), Danobat Composites (Elgoibar, Spain), Apodius (Aachen, Germany), FACC AG (Ried im Innkreis, Austria) and Fives.
Inspecting next-generation wing panels
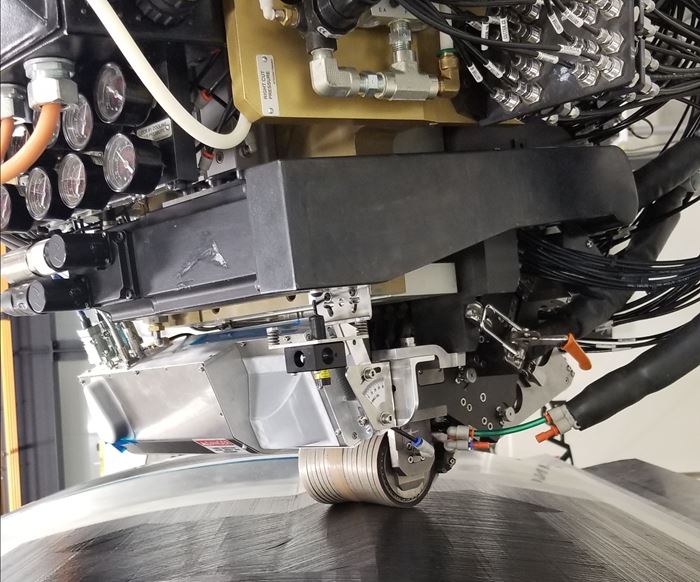
Electroimpact’s automated inspection system enables inspection of wing panel structures for Boeing’s 777X. It consists of three LASERVISION projector units from Aligned Vision (Chelmsford, Mass., U.S.), each equipped with a high-resolution camera and a laser projector. The units each work with a laser profilometer — a small laser that projects a line onto the work surface — mounted on the AFP machine head. The three elements (laser, camera, profilometer) provide data to a user interface supported by computer software algorithms. (Read more about Electroimpact’s solution in CW contributor Sara Black’s article “Improving composites processing with automated inspection.”)
Dry material placement inspection
Meanwhile, Danobat Composites has been working to develop two types of technology and software systems to support automated process inspection for its automated dry material placement (ADMP) machines. The first uses a laser profilometer, or LLT (laser line triangulation) sensor, to map the edges of the dry materials during lay-down and detect whether fabric positions are within specified tolerances. The second method involves a combination of LLT sensing and photometric scans with camera sensors.
Measuring fiber orientation
Apodius, a subsidiary of Hexagon Manufacturing Intelligence (North Kingstown, R.I., U.S.), has developed successive iterations of its Apodius Vision System. The optical system for fiber orientation measurement and defect detection allows up to three fiber orientations to be detected, measured and analyzed. Fiber orientation can be measured to 0.1-degree resolution by evaluating the recorded raw image data of the surface texture compared to the textile’s actual design, including woven, noncrimp and braided fabrics. The system enables statistical process control (SPC) for the release of preforms into production and is being employed in several large-scale production lines.
(Read more about the Danobat and Apodius technologies in “Improving composites processing with automated inspection, Part II.”)
Configuring inspection tasks
In August 2018, FACC began a three-year research project aimed at streamlining the setup of industrial inspection robots. The SPIRIT project, under the lead of Profactor GmbH (Steyr, Austria) along with scientific and industrial partners from Austria, Germany and Italy, aims to develop programming software for a new generation of inspection robots, which will be able to deal with a range of challenges such as switching between different inspection technologies and inspecting new parts.
“The goal of the project, in line with our aim of advancing robotic solutions, is to replace the time-consuming and highly skilled task of robot programming with simply configuring the inspection task,” says Helmuth Hoeller, director of the NDT division at FACC.
According to FACC, the inspection robot will use a CAD model of the component, along with the CAD model of the work cell, to automatically generate robotic programming for the particular task at hand. (Read more about the technology in the news story “FACC awarded inspection robot research project.”)
Next-generation AFP surface profile measurement
Recently, the National Research Council of Canada (NRC, Ottawa, Canada) and Fives joined forces to develop an advanced profilometer for material placement aimed at providing faster and more accurate part inspection.
According to Ken Wright, chief technology officer at Fives, the company’s In-Process Inspection (IPI) technology is a derivative of infrared interferometry — an optical technology that uses infrared light waves to measure distance. Wright says the profilometer shows considerable advantages over existing inspection technologies used for the same purpose. The new profilometer is not dependent on the angle of the surface and is said to be more robust in ambient light conditions. The system also rides along with the AFP head and is thus able to access more confined spaces. In tests conducted since late 2017 on NRC’s Cincinnati Viper 4000 AFP, located at STELIA Aerospace-North America (Mirabel, Quebec, Canada), the new profilometer has reportedly demonstrated improved results over LLT.
The next-generation sensor is said to provide real-time defect measurement and real-time tow placement measurement, and it works with a range of composite material types. It is reportedly capable of reducing processing time by up to 30 percent compared to layup operations using manual inspection.
NRC holds the basis patent for the next-generation profilometer and has licensed it exclusively to Fives for composites manufacturing applications. Fives has begun the final testing stage with customers and expects to commercialize the technology before the end of 2019.
What’s next?
Next-generation commercial aircraft programs — with some possibly targeting build volumes of 100 per month — obviously cannot rely on manual inspection of composite parts and structures to meet rate requirements. Given this, automated inspection has become a necessity and the aerocomposites supply chain has clearly gotten the message that old technologies will not suffice.
The Next Generation of Aerospace Manufacturing
With the commercial aviation industry projected to double in the next 20 years, meeting the demand for passenger and freight aircraft will require new technologies and unprecedented manufacturing rates.
Learn more about the materials and processes that will shape next-generation aircraft in a collection of stories from CompositesWorld, Modern Machine Shop and Additive Manufacturing, available to read or download for free. Get it here.
Related Content
SMC composites progress BinC solar electric vehicles
In an interview with one of Aptera’s co-founders, CW sheds light on the inspiration behind the crowd-funded solar electric vehicle, its body in carbon (BinC) and how composite materials are playing a role in its design.
Read MoreThe future of quartz and oxide fibers at Saint-Gobain Advanced Ceramic Composites
New business builds on 100-year legacy in quartz, prepares for growth, while starting production of oxide fibers to meet increased demand for CMC by aerospace and industrial sectors.
Read MoreLife cycle assessment in the composites industry
As companies strive to meet zero-emissions goals, evaluating a product’s carbon footprint is vital. Life cycle assessment (LCA) is one tool composites industry OEMs and Tier suppliers are using to move toward sustainability targets.
Read MoreAutomotive chassis components lighten up with composites
Composite and hybrid components reduce mass, increase functionality on electric and conventional passenger vehicles.
Read MoreRead Next
Plant tour: Daher Shap’in TechCenter and composites production plant, Saint-Aignan-de-Grandlieu, France
Co-located R&D and production advance OOA thermosets, thermoplastics, welding, recycling and digital technologies for faster processing and certification of lighter, more sustainable composites.
Read MoreAll-recycled, needle-punched nonwoven CFRP slashes carbon footprint of Formula 2 seat
Dallara and Tenowo collaborate to produce a race-ready Formula 2 seat using recycled carbon fiber, reducing CO2 emissions by 97.5% compared to virgin materials.
Read MoreDeveloping bonded composite repair for ships, offshore units
Bureau Veritas and industry partners issue guidelines and pave the way for certification via StrengthBond Offshore project.
Read More

