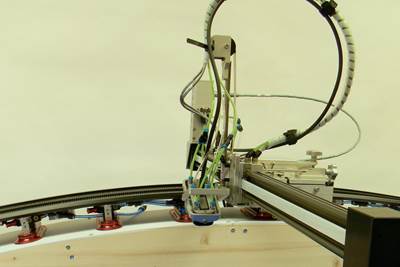
Innovation in ultrasonic inspection and nondestructive testing
With increasingly complex structural components working their way into aerospace programs, the need for versatility in inspection and testing capabilities is growing.
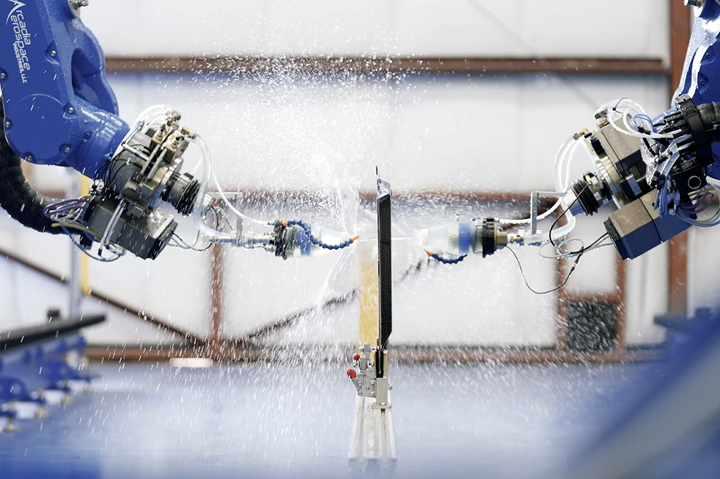
In addition to conventional ultrasonic testing methods for high-rate aerospace production, Arcadia Aerospace Industries (AAI) specializes in custom solutions for a number of nondestructive testing (NDT) processes. Photo Credit, all images: Arcadia Aerospace Industries
The use of carbon fiber composites in aerospace applications continues to evolve. What started out as a replacement material for metal largely selected for lightweighting has become a material of choice for increasingly complex structural components. As a growing number of structural parts are made with composites and new aircraft such as electric vertical takeoff and landing (eVTOL) aircraft are approaching qualification, quality testing needs are also evolving and nondestructive testing (NDT) must keep pace both with new parts and increased production rates.
Arcadia Aerospace Industries LLC (AAI, Punta Gorda, Fla., U.S.) was founded by Charles Bushman in 2007 to address what he perceived was a gap in the aerospace industry: automated nondestructive testing (NDT) for a growing number of increasingly complex aerospace components made from carbon fiber.
The company got its start with Boeing, using phased array ultrasonic testing (UT) to inspect shear ties. This became the catalyst to developing other relationships with other aerospace companies including GKN Aerospace, HondaJet and GE, and from there Arcadia quickly evolved. While building a foundational business in conventional UT services for aerospace, the company saw an opportunity to help its customers address the growing need for testing aerospace components with complex geometries.
“When I first started in the industry back in the early ‘80s, a lot of the composite [aerospace] parts you saw were [selected] basically because of the weight reduction — they were using them for ducts and a lot of non-structural components,” says AAI director of NDT Byron Vines. “Today, we’ve come to understand more about how these composites handle dynamic loading situations.”
AAI vice president Jeffrey Phillips agrees. “It seemed like there was a gap in the industry, in particular, a lack of customer-focused customized solutions, whether it be for inspection or machinery. ”
Today, AAI performs three main business functions. One is the offering of third-party independent NDT services. Customers can elect to send parts to the company’s Alabama-based lab in Tallassee for inspection services based on their specifications or AAI can send out a technician to inspect on location. Overall, the solutions or the inspection methods that AAI specializes include conventional ultrasonic testing (UT), phased array ultrasonics, air-coupled UT, X-ray (both portable and robotic), eddy current testing (ETC) and thermography.
The company also designs custom NDT solutions and systems for large prime and subprime contractors in the aerospace industry with in-house NDT departments in need of automated equipment. Lastly, AAI offers consulting for customers interested in building an NDT department.
“As parts become more complex, the demands for customized systems have also gone up,” says Phillips. “That’s kind of where we’ve been able to make a mark in the industry — our customer focus and customized solutions for systems.”
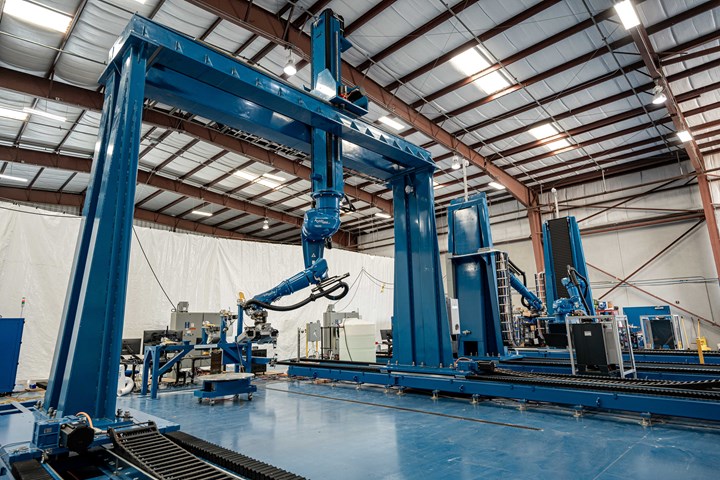
AAI’s robotic x,y,z bridge and dual tower x,z robotic scanning systems are designed specifically for complex contoured aerostructures.
A focus on customization
AAI’s solutions are developed at its engineering headquarters based in Punta Gorda, Florida — a 34,000 square foot manufacturing space where the company designs, builds and commissions all of the customized machinery for its customers. That same expertise enables AAI to offer specialized services at its Alabama location, which focuses on providing UT services for high-rate aerospace programs.
AAI’s ability to both provide NDT services and build inspection solutions is one of the things that makes the company unique. “We know what it takes to inspect parts at volume, and when we have a customer who has a special need for a different method, we have experience on the build side,” says Phillips.
Customizing for complex structures
While it is important to note that the majority of composite components that are manufactured in the aerospace community typically require either through transmission or pulse echo inspection, there is an increasing need for flexible, outside-the-box solutions. This is especially the case for parts with complex geometries, such as those that have been 3D printed.
“In many cases, customers are looking for a supplement to conventional ultrasonics, and in some cases a new technology is needed,” emphasizes Vines.
To develop these, AAI typically begins with inspection of various parts for the customer to determine what may be the best inspection solutions. “We’re finding more and more, as the parts get increasingly complex, that conventional UT isn’t providing an answer for every part in their catalog,” says engineering project manager Mark Pope. “When that’s the case, then we expand out to different inspection technologies and go through a testing process — usually by getting in scrap components and performing different test studies on them, verifying that we can see all the defects and determining which methods will be the fastest.”
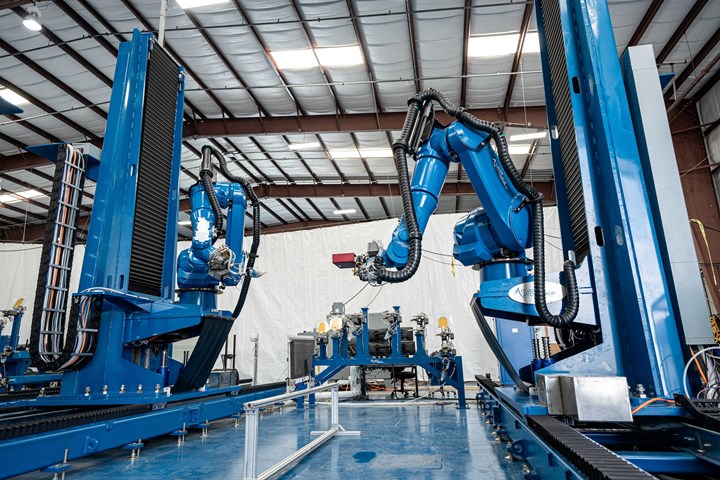
AAI’s 16-axis dual tower x,z robotic inspection system has the ability to perform optical inspection, conventional through transmission/pulse echo and phased array.
Contoured part scanning capabilities
AAI’s Alabama facility features two 10-axis gantry systems, one dual robot system and one dual robot x,y,z tower system. These four systems can accommodate both large and small components.
“A lot of [companies] have scanners that can do flat panel scanning, but the ability to bring a part in with complex contours and scan that and maintain the appropriate scanning amplitudes is not something that everyone can do,” says Vines. “But it’s something that we do very well.”
The 10-axis gantry system and or dual robot X, Y, Z tower system AAI’s Alabama facility are capable of scanning large aerospace parts that are difficult to process on conventional horizontal scanners. For example, it is used to inspect the complete fuselage for the HondaJet aircraft. That fuselage is made in two halves, each combining nose (honeycomb sandwich structure), barrel (stiffened panel with co-cured stringers) and tail cone (honeycomb sandwich structure) into a co-cured integral structure. However, before the halves are joined, each must be inspected.
Pope describes the machine: “We use a motion controller that allows us to coordinate both sides of the machine very accurately, so that we can track both sides of the component and create simultaneously high quality through transmission and pulse echo inspections.”
AAI’s system has the ability to perform pulse echo and through-transmission ultrasonic (TTU) C-scan inspections (see sidebar above). While TTU typically provides a lot of data, including a colored spatial plot across the part indicating both location and relative severity of defects, there are cases where it doesn’t work. For example, in structures with aramid honeycomb, the highly attenuative core prevents seeing the second skin. Any defects beyond the core aren’t visible. AAI’s system provides a solution in that it can scan using pulse echo from both sides of the part simultaneously.
Any frequency combination can be used on any of AAI’s systems. Typically AAI will use a combination of 1 megahertz and 5 megahertz, with 1 and 5 megahertz used for through transmission and 5 megahertz only for pulse echo. The benefit of through transmission is enabling scans of thicker, less dense materials but requires access to both sides of the part. Pulse echo enables access from only one side.
AAI can also perform C-scan inspections at 1 and 5 megahertz simultaneously. Other frequencies can be integrated depending on the application requirement. Pope explains that testing processes typically involve running one frequency for the laminate portions of a part and then running the part again at a different frequency for other portions — reinforced core sections, for example. The multiple frequency system affords the ability to scan different aspects of parts simultaneously and collect the information on multiple channels. This can make a huge difference, notes Pope, especially when sometimes running a larger part can take up entire shifts.
“We have the ability to change heads and go from one whole method of inspection to a totally different method of non-destructive testing without dismantling the setup or the tooling. It’s a great time saver — sometimes days,” says Vines.
The benefit of the tool changer at the wrist of the robot allows the technician to change from one NDT methodology to another in a matter of seconds, greatly increasing the efficiency of the system.
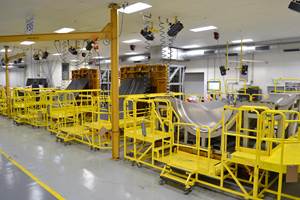
Universal part carts can be used to accommodate many geometry styles and hold multiple parts during a single inspection. If required, AAI has the ability to fabricate custom holding fixtures to properly orientate complex parts.
AAI uses phased array UT in a variety of systems, including immersion tanks and with both flat and curved phased array probes. It can automate inspection to provide one-pass scanning of multidimensional composite components that incorporate radii, angular variations and curvatures, achieving high throughput rates. For example, its squirter system with a 64-element phased array transducer has helped the company significantly reduce inspection time for one part. “It normally takes 40 minutes to inspect with conventional UT,” says Pope. “But with this phased array system, we’re down to 3 minutes and 20 seconds to inspect that part.”
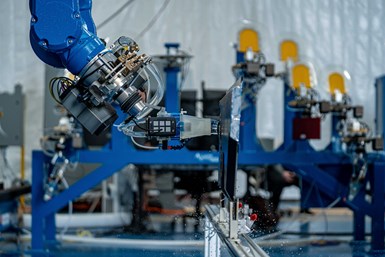
AAI’s phased array capabilities allow for multidimensional one-pass scanning of complex parts.
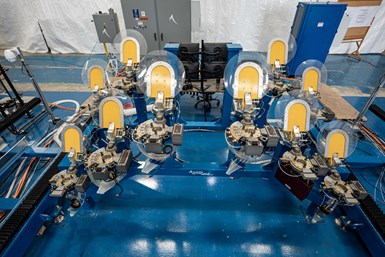
Quick change capabilities improve efficiency.
Complex part case history: GKN and HondaJet
A good example of what AAI brings to the industry is its partnership with GKN Aerospace (Tallassee, Ala., U.S.). AAI provides NDT services for products GKN produces for Sikorsky, Airbus, GE, Honda Jet and several missile programs. Paul Hurley, GKN’s global manager, composite aerospace materials (defense), says the relationship between GKN and Arcadia began several years ago when the GKN site at Tallassee, Alabama, didn’t have the ability to conduct NDT inspection on the large fuselage it produces for HondaJet. “This partnership between GKN and Arcadia has allowed GKN to develop and maintain this capability on-site,” Hurley says. It has also grown from providing NDT for one product on one program to providing testing for five programs at a rate of approximately 1,000 parts per month.
Hurley adds that leveraging AAI’s NDT enables GKN to focus on its own core competencies in composite aerospace structural design, engineering and manufacturing. “Arcadia was able to develop highly automated solutions to customer-directed material testing requirements for GKN. Additionally, Arcadia is also working with GKN to introduce advanced robotics inside our aerospace manufacturing facility in Alabama. This is a true partnership, where we can receive the benefit of allowing each company to focus on its core competency in support of a common cause.”
Evolution of an industry
It’s an interesting time for the aerospace industry. Composites are now used on a wide range of aircraft programs and increasingly in structural applications. They have already been selected by numerous advanced air mobility companies, where collaborations with automotive companies point to ambitious plans for high-rate production of eVTOLs and other new aircraft. All of these trends will in turn influence production processes in commercial aerospace. Pope points out the trend toward bonding and welding instead of using fasteners, which poses inspection challenges, especially the ability to see kissing bonds and properly welded joints.
Vines speaks about this evolution in terms of how parts are being designed with inspection in mind as part of the production process. “Back in the old days, when I was first starting engineering, you’d design a part, build it and then try to come up with an inspection plan,” he says. “Now, a lot of that planning is done in the upfront design of these parts.”
As the aerospace market continues to evolve, increased efficiency is crucial — and AAI is ready to meet those needs by solving NDT challenges, providing customized solutions for inspecting complex parts and increasing the throughput, sometimes with 8-10 times less inspection time.
In addition, GKN makes the point that lessons learned from improved inspection help move the industry forward. “Arcadia’s growing expertise on aerospace material testing requirements also translates into better support to GKN across multiple programs,” says Hurley. “Ultimately, our customers can rely on both GKN and Arcadia for precise and reliable testing that ensures high-quality products delivered on time with the appropriate documentation to prevent any non-conformities. The NDT information received from Arcadia allows the GKN engineering team to discuss, with precision, the material characteristics of GKN products with both internal and external inspection teams. Obviously, there’s value for an engineer to better understand various material characteristics (i.e., porosity, curing characteristics, etc.) to enable them to translate that information in order to improve both part designs and the manufacturing process according to customer specifications.”
AAI thrives on its role in supporting the industry. Phillips sums it up: “We’re not developing new NDT technologies. What we’re doing is integrating the needed technologies and applying them to our customers’ problems in ways that are innovative — tool changing, multiple NDT methodologies, the configurations of the machines that will fit specific applications. It’s our integration ability, our ability to stay up with the latest technologies and our ability to customize that really sets us apart in the industry.”
Related Content
A new era for ceramic matrix composites
CMC is expanding, with new fiber production in Europe, faster processes and higher temperature materials enabling applications for industry, hypersonics and New Space.
Read MoreThe potential for thermoplastic composite nacelles
Collins Aerospace draws on global team, decades of experience to demonstrate large, curved AFP and welded structures for the next generation of aircraft.
Read MoreNext-generation airship design enabled by modern composites
LTA Research’s proof-of-concept Pathfinder 1 modernizes a fully rigid airship design with a largely carbon fiber composite frame. R&D has already begun on higher volume, more automated manufacturing for the future.
Read MorePlant tour: Middle River Aerostructure Systems, Baltimore, Md., U.S.
The historic Martin Aircraft factory is advancing digitized automation for more sustainable production of composite aerostructures.
Read MoreRead Next
Welding is not bonding
Discussion of the issues in our understanding of thermoplastic composite welded structures and certification of the latest materials and welding technologies for future airframes.
Read MoreNondestructive inspection methods available to composites manufacturers
An overview of composite laminate inspection techniques ranging from manual testing methods to more advanced, noncontact options.
Read MoreHow ultrasonic testing can find flaws in composite materials
As composite applications expand, so does the demand for more capable inspection systems. Ultrasound has proven to be effective when it comes to in-depth, sophisticated testing.
Read More

