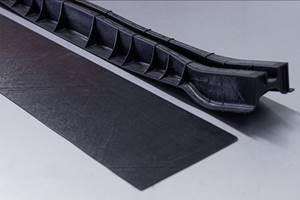
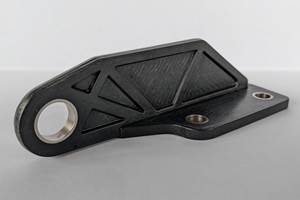
Xarion’s laser-excited acoustics (LEA) is a couplant-free nondestructive testing (NDT) method that uses laser principles and an optical microphone without a membrane. In a single-sided “pitch-catch” configuration to test a sandwich panel, the LEA system demonstrates the precision of the laser and optical microphone in identifying structural irregularities. Source (All Images) Xarion
Defects and damage in composite structures that may be introduced through the manufacturing process, environmental factors and other conditions are often difficult to detect with the human eye, posing a significant risk of failure should they go unnoticed. Therefore, it is essential to implement defect detection and quality monitoring, such as nondestructive testing (NDT), to ensure their high quality and reliability.
NDT provides a noninvasive way to examine the hidden world of composites integrity without causing any damage to the very parts it aims to safeguard. Common NDT technologies include X-ray, eddy current, ultrasonic testing (UT) and infrared or thermal wave methods. UT is the most widely used form of NDT for composites in the aerospace, motorsport and high-end automotive industries. More specifically, liquid-coupled piezoelectric ultrasonic transducers are the most common type used.
However, liquid coupling is not compatible with materials or systems that cannot get wet and composites typically must be dried afterward, often requiring lengthy heating cycles. Water use, treatment and reuse in facilities can also be an issue. Alternative couplant-free technologies such as air-coupled ultrasound or laser ultrasound (LUS) are available, but they lack the required sensitivity and resolution for high-end applications, or are very costly, large and sensitive to surface conditions and material properties.
Recently, a couplant-free, high-sensitivity, high-resolution NDT technology has become commercially available, leveraging laser physics and a membrane-free optical microphone. Known as laser-excited acoustics (LEA), the technology was invented by physicist and musician Balthasar Fischer while he was studying at the Vienna University of Technology.
An ultrasonic image reveals defects within a composite structure using LEA (left), captured by Xarion's advanced optical microphone (right), which records a wide frequency range of sound waves without the limitations of traditional membrane-based microphones.
The inspiration for Fischer’s invention arose from an incident during a concert hall recording, where interference from a nearby subway train was captured in the recording, which used traditional membrane microphone technology. This experience motivated Fischer to develop a more effective method for capturing sound waves free from the limitations of membrane microphones.
Notably, Fischer’s membrane-free microphone, using laser optics, is capable of capturing sound waves across a frequency range 200 times larger than the audible spectrum. Recognizing its extensive utility, Fischer saw that this technology had potential in NDT, particularly in measuring ultrasonic waves passed through composite materials. “Its laser-based nature allows for the detection of defects in complex structures, providing enhanced sensitivity and resolution compared to other noncontact NDT methods,” explains Fischer.
To bring this invention to the market, Fischer founded Xarion (Vienna, Austria) in 2012. The company gained support from notable shareholders, including a member of the Porsche family and laser manufacturer Trumpf.
Principles of operation
LEA measures sound with light by modulating sound patterns onto light proportional to the sound pressure of the ultrasonic signal. An excitation laser serves as the pulser, generating the ultrasound signal, while an optical microphone acts as the receiver.
This diagram illustrates the principle of laser interferometry used in Xarion’s optical microphone for detecting sound waves. The laser beam is modulated by sound pressure, changing its intensity as it passes through a cavity between two mirrors.
All ultrasonic waves generated by the excitation laser pass through the material and are detected by the microphone unless they encounter an interface with differing density, such as a defect, void, delamination or foreign material. When ultrasonic waves interact with these interfaces, they generate a signal used to create an image.
Inside the optical microphone head, which measures only a few millimeters, a small air cavity is formed by two semi-transparent mirrors. According to Fisher, “From a glass fiber, the laser beam couples through one of the mirrors into the cavity where it is reflected back and forth. The length of the cavity can host a multiple of the laser’s wavelength so that the laser light constructively interferes.”
Sound and ultrasound alter the refractive index of the air, affecting the laser’s wavelength in the cavity. This changes the amount of light coupling back into the fiber, enabling the photodiode (a semiconductor diode sensitive to photon radiation) to detect a change in brightness and convert it into a voltage signal that is easily measurable. Measuring the intensity of the light that emerges from the other side of the sound wave produces an output signal proportional to the change in air density.
The system operates interference and distortion-free across its frequency range, and its high sensitivity allows it to measure sounds from deep infrasonic waves to ultrasound in the megahertz (Mhz) range; specifically, the photodiode’s output voltage changes linearly over a wide range of acoustic pressures and frequencies, extending from 10 hertz (Hz) to 4 MHz. Moreover, the detection principle ensures a flat frequency response over this large bandwidth, without any mechanical movement. This reduces the effective blind zone often associated with piezoelectric transducers.
LEA technology in action
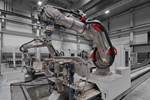
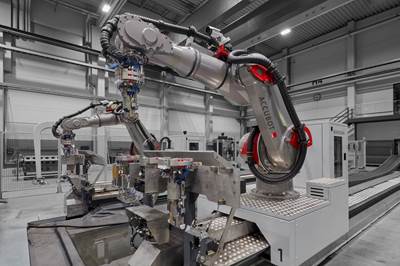
Robotic arm equipped with Xarion's LEA technology scans a composite panel for internal defects, illustrating the application of advanced automation in NDT.
LEA can operate in a through-transmission testing arrangement, with the excitation laser and optical microphone on opposite sides of the sample, or in a single-sided “pitch-catch” configuration where both sender and receiver are on the same side.
Fischer explains, “Within the sensor head, the ultrasound pressure is measured directly in the air using laser detection; the ultrasound does not need to couple into a solid like it does for a piezoelectric receiver. From the four solid-air interfaces for air-coupled ultrasound, only one interface, from the sample to air, remains.” This significantly enhances the signal-to-noise ratio and makes the detection process unaffected by the optical quality of the sample surface, such as roughness, enabling its application for a wide range of materials and geometries where previously contact-free NDT techniques could not be employed.
Furthermore, both the excitation laser and the optical microphone remain operational even with an off-normal misalignment of ±5°. These features, combined with the compactness of the all-fiber-coupled probe head (measuring approximately 35 × 17 × 50 cubic millimeters), make LEA a viable, contact-free alternative for NDT of parts with complex geometries and compositions.
LEA can also detect the integrity of coatings. The primary challenge in this application is using a measurement technique sensitive enough to detect defects within the coating while avoiding measurement of the underlying component. LEA accomplishes this by sending in ultrasound and measuring reflections at micron depths, influenced only by properties present in the coating sample.
Application-specific technology
A robotic system with an end effector equipped with the LEA unit enables the required mobility when scanning over components and is the most widespread configuration for composite NDT with this technology. While Xarion specializes in LEA technology, the company relies on system integrators to combine its sensors with robotics to create a fully functional system.
Laser shots are deposited in a point-to-point fashion, with each shot representing a single pixel. These shots are compiled to create a transmission scan image. With the specimen mounted in a fixture, measuring the sample area at a user-defined step size to as low as 0.5 millimeter in both the X and Y directions enables high resolution. The excitation laser and the optical microphone can either be assembled in a through-transmission or a single-sided setup, depending on the needs and constraints of the application.
Dual-sided LEA test setup with the excitation laser and optical microphone positioned on opposite sides of the sample for through-transmission testing.
“The single-sided setup, wherein the excitation and receiver are on the same side, is suitable for large components such as aircraft inspections where access to both sides is limited,” highlights Fischer. “Thanks to the wide bandwidth, it can detect tiny defects, providing a sharp image of the part’s internal structure.” The depth of a defect can be estimated to some extent by analyzing the time delay between the transmission and reception of the acoustic signal. If the defect is located deep inside the object, the signal will take longer to travel down and back up again, resulting in a longer time delay.
Conversely, if the defect is shallow, the signal will return more quickly. Therefore, by evaluating the time-of-flight, users can determine the approximate depth of the defect, as well as see it displayed in the output from the ultrasonic wave reflections. “The LEA systems can be scaled for large component scans, using up to 16 microphones in an array” notes Fischer. “We recently created a probe head that has eight microphones with a pitch of 2 millimeters, which speeds up the scanning process significantly. We use ultrasonic time sequence to build up an image based on the pulse being measured at high speed to cover a far larger area in a given timestep.”
Measuring material properties
In LEA investigations, dispersion measurements can be carried out by placing a stationary laser on the sample, firing it and then moving away, returning with the optical microphone to observe the dispersion of the acoustic wave. By analyzing the output, material properties like elastic modulus can be determined as it is connected to the speed of sound. Strain is also a critical variable in the equation; however, this is more complicated as researchers must control all other variables.
“Our customers have conducted projects looking into material properties, including strain,” explains Fischer. “In industry applications, material properties are often overlooked in favor of detecting defects, which is a simpler task. However, in a research context, material properties can have a significant impact on the speed of sound. By measuring the speed of sound in a tailored way, it is possible to derive a number of interesting properties. This is particularly relevant in the semiconductor industry, where wet processes can lead to high rates of part rejection.”
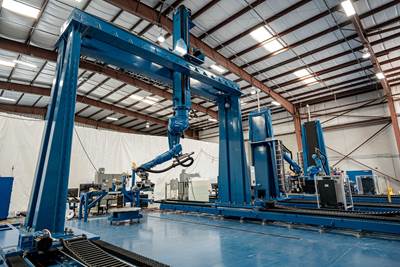
Additionally, production line part investigation controls can offer a 100% testing rate, presenting a significant opportunity in high-volume industries such as aerospace and automotive. “Several leading aerospace firms, including Airbus, are currently utilizing the Xarion technology to conduct inspections in difficult-to-access areas of manufactured parts and systems,” notes Fischer. “As Xarion’s LEA detection technology eliminates the necessity of coupling fluids, it is [also] particularly effective for space companies that must avoid contaminants to preserve the integrity of their systems and components. Xarion also provides these customers with gantry systems, which offer inspection speeds of up to 50 square meters per hour, as well as highly customized dual-robot systems for the most intricate inspection tasks.”
LEA provides a comprehensive solution for detecting defects in complex composite structures, ensuring interference-free integrity and reliability of critical composite components across various industries. “The ability to detect flaws at the resolution we can see without any couplants truly sets our technology apart,” concludes Fischer. “LEA not only enhances the precision and efficiency of inspections but also opens new possibilities for applications in fields previously deemed challenging. We are excited about the future and the potential our technology holds for evolving nondestructive testing.”
Related Content
Optimized approach to predict delamination failure in CFRTP structures
ARRK Engineering and Mitsui Chemicals improved delamination prediction accuracy to help optimize absorbed energy/failure load for an overmolded TAFNEX CF/PP UD tape bumper beam.
Read MoreBladder-assisted compression molding derivative produces complex, autoclave-quality automotive parts
HP Composites’ AirPower technology enables high-rate CFRP roof production with 50% energy savings for the Maserati MC20.
Read MoreActive core molding: A new way to make composite parts
Koridion expandable material is combined with induction-heated molds to make high-quality, complex-shaped parts in minutes with 40% less material and 90% less energy, unlocking new possibilities in design and production.
Read MoreOptimizing a thermoplastic composite helicopter door hinge
9T Labs used Additive Fusion Technology to iterate CFRTP designs, fully exploit continuous fiber printing and outperform stainless steel and black metal designs in failure load and weight.
Read MoreRead Next
Innovation in ultrasonic inspection and nondestructive testing
With increasingly complex structural components working their way into aerospace programs, the need for versatility in inspection and testing capabilities is growing.
Read MoreAutomated robotic NDT enhances capabilities for composites
Kineco Kaman Composites India uses a bespoke Fill Accubot ultrasonic testing system to boost inspection efficiency and productivity.
Read MoreDeveloping bonded composite repair for ships, offshore units
Bureau Veritas and industry partners issue guidelines and pave the way for certification via StrengthBond Offshore project.
Read More


