ORNL, Zeiss to improve CT inspection for 3D-printed parts
Five-year research collaboration starts with metal AM parts and is considering 3D-printed composites next, incorporating machine learning into CT scanning to reduce time, cost of inspections by 10 times and improve quality.
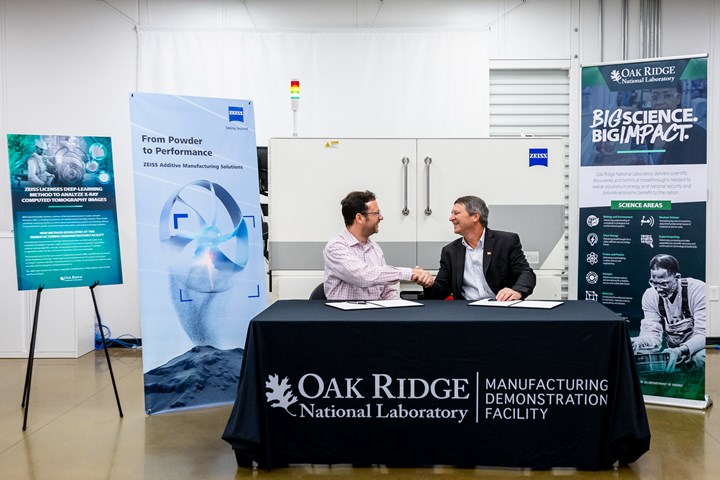
A licensing agreement between the Department of Energy’s (DOE) Oak Ridge National Laboratory (ORNL, Oak Ridge, Tenn., U.S.) and research partner Zeiss Industrial Quality Solutions (Oberkochen, Germany) will enable industrial X-Ray computed tomography (CT) to perform rapid evaluations of 3D-printed components using ORNL’s machine learning algorithm, Simurgh. Incorporating machine learning into CT scanning is expected to reduce the time and cost of inspections by more than 10 times while improving quality.
The licensing is part of a 5-year research collaboration between ORNL and Zeiss, supported by the DOE’s Advanced Materials and Manufacturing Technologies office and a Technology Commercialization Fund award. The research has focused on using CT scanners and other measuring devices to see inside 3D-printed parts to check for cracks and other defects during the manufacturing process. CW was told that while 3D-printed metal components have been the main focus so far, the techniques are applicable to composite scans and the team has had some discussions about testing composites in the next phase.
One of the challenges to broader adoption of 3D printing is how to examine a part to ensure it contains no hidden flaws that could affect performance. Nearly all products have some level of material flaws; however, traditional manufacturing techniques are backed up by decades of experience that let manufacturers know what to expect. The nature of 3D printing requires a different approach to examining parts, using advanced characterization techniques to understand the distinct features inside an item. That’s where CT comes into play.
“CT is a standard nondestructive technique used in a multitude of different industries to ensure the quality of the component that is being produced [read “Applying CT scan data analysis and visualization to composites”],” says ORNL researcher Amir Ziabari. “But CT is traditionally an expensive and time-consuming process. The challenge is how can we leverage what we know of physics and technology to speed up the CT process to allow it to be more broadly adopted by industry.” The research is being performed at DOE’s Manufacturing Demonstration Facility (MFD) at ORNL.
Zeiss is is constantly working toward quality consistency and repeatability as it develops solutions specifically for additive manufacturing (AM), from process qualification and ensuring printer equivalency, to in-process monitoring for fully automated analysis of defect types, characteristics and patterns.
“Zeiss and ORNL have a long partnership that has led to the development of innovative solutions for automated analysis and qualification,” Paul Brackman, AM manager at Zeiss, says. “We are now looking to further improve process development and qualification for AM, to enable large-scale adoption and the shift from prototyping to manufacturing.”
“Understanding what type of defects might be present is important for understanding material behavior.”
In the characterization lab at the MDF, Zeiss has equipment including industrial CT systems and scanning electron microscopes that are being used to look for the slightest defects in 3D-printed parts. The scan is only the first step, however. The data from the scan must run through complex analytics to determine where flaws are located. This process requires a lot of computing horsepower, which equates to time and cost. The Simurgh framework uses deep learning to speed up the scanning and analysis time significantly while providing even more accurate results.
This kind of highly accurate characterization is critical for high-value parts that must operate in extreme environments where failure is not an option. ORNL used CT scanning techniques to certify the performance of nuclear fuel assembly brackets that were inserted into the Browns Ferry Nuclear Plant in Alabama in 2021, the first time a 3D-printed part has ever been placed inside a nuclear reactor. CT characterization was also critical to creating 3D-printed turbine blades that were recently tested in a land-based engine where blades spin at speeds of up to 12,000 revolutions per minute in an environment that can top 800ºC. The blades withstood the harsh environment of the turbine and performed exactly as expected.
“Understanding what type of defects might be present is important for understanding material behavior,” says MDF director Ryan Dehoff, who led the nuclear bracket development. “In these types of parts, any defect or tiny pore in the material could result in a catastrophic failure.”
Current CT scanning technology limits the size, shape and type of materials that can be scanned. For manufacturers, it makes sense to use the technique for small numbers of high-value components like turbine blades. It also makes sense for validating a small number of parts from a larger run, extrapolating from the test batch to see how the entire run will perform.
But the ORNL and Zeiss team plan to reduce the time and cost of CT scanning, allowing it to become as common as a visual inspection might have been for parts flowing off an assembly line decades ago.
“My ultimate goal, what I would like to achieve, is to make this so fast that we can put this in a production line so every part can be CT scanned rapidly and reliably,” Ziabari says. “If we can get there, that would be a game-changing development that would allow 3D printing to really fulfill its potential.”
Related Content
Automated robotic NDT enhances capabilities for composites
Kineco Kaman Composites India uses a bespoke Fill Accubot ultrasonic testing system to boost inspection efficiency and productivity.
Read MoreJeep all-composite roof receivers achieve steel performance at low mass
Ultrashort carbon fiber/PPA replaces steel on rooftop brackets to hold Jeep soft tops, hardtops.
Read MoreComposite sidewall cover expands options for fire-safe rail components
R&D project by CG Rail explores use of carbon fiber-reinforced thermoplastics and recycled manufacturing scrap to meet fire safety, weight and volume targets.
Read MoreNine factors to consider when designing composites cure tooling
Gary Bond discusses the common pitfalls and compromises when designing good cure tooling and their holistic significance for a robust composite production process.
Read MoreRead Next
Measuring ply-wise deformation during consolidation using embedded sensors
Strip-type shape sensor method claims real-time measurement of ply-wise deformation.
Read MoreCRP 3D printing composites optimize Formula SAE team’s racing performance
Long-term CRP USA and UVic Formula Racing partnership has culminated in the development of versatile, durable carbon fiber-filled components that continue deliver on the track.
Read MoreOptima 3D demonstrates new 3D weaving technology for ASCC
U.K. company will install compact system with innovative shuttle and digital twin capability for soft and hard composite structures at University of Maine’s new textile lab.
Read More


