Certification of bonded composite primary structures
OEMs develop technology to quantify uncertainty in pursuit of the no-bolt bondline.
Composites have flown on commercial aircraft primary structures — those critical to flight — for more than 30 years, but only recently have they conquered the fuselage, wingbox and wings, most notably on the Boeing Co.’s (Chicago, Ill.) 787 Dreamliner and the A350 XWB from Airbus (Toulouse, France). These carbon fiber-reinforced plastic (CFRP) structures, however, still require assembly with thousands of mechanical fasteners. Why? Because it is the easiest and least expensive way to meet current certification requirements, which mandate proof that each and every adhesively bonded joint will not separate and cause structural failure should it reach its critical design load. But many in the industry argue that the full cost and weight savings of composites cannot be realized until bonded joints can be certified without fasteners.
The development of technologies to address this need has steadily progressed, from programs in the late 1990s such as the U.S. Department of Defense (DoD) Composites Affordability Initiative (CAI) to more recent initiatives, including the European Union (EU)-funded Boltless assembling Of Primary Aerospace Composite Structures (BOPACS) project. Here, HPC looks at current efforts to build a certification regime for bonded primary structures on aircraft. Boeing, Airbus and Lockheed Martin Aeronautics (Palmdale, Calif.) have mounted independent efforts toward that end. Their research offers the hope of building reliability into the bonding process, and of gauging final bond strength via a coordinated certification system that includes design, process control and quality assurance (QA).
Why bolt and why bond?
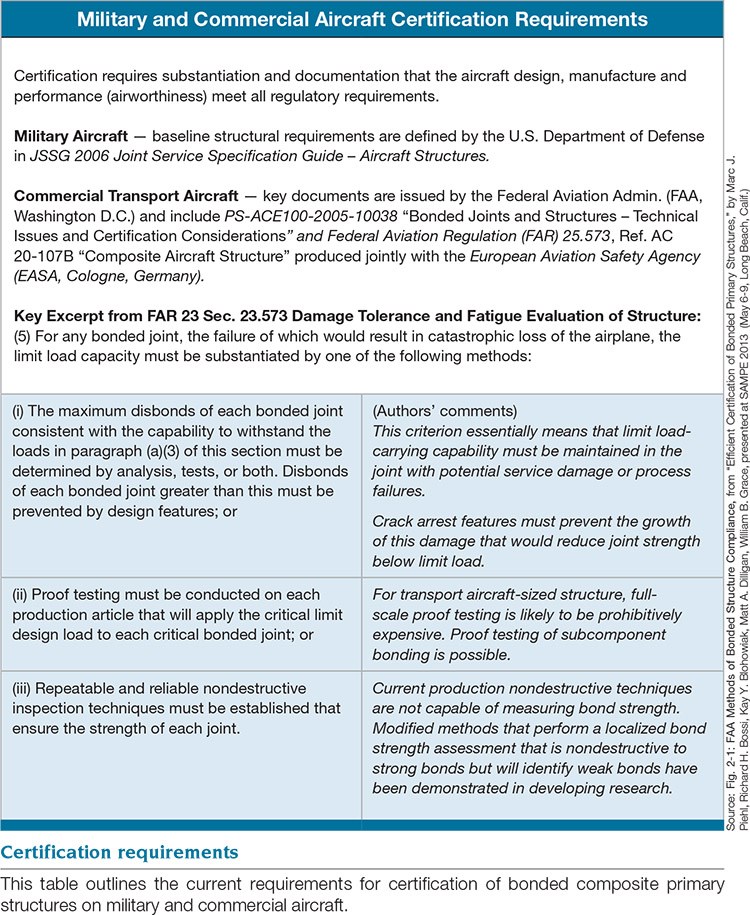
Fasteners are used in composite primary structures today due to certification requirements. These were outlined in a 2013 SAMPE (May 6-9, Long Beach, Calif.) presentation titled “Efficient Certification of Bonded Primary Structures,” by Kay Blohowiak, a technical fellow working in Composite Bonding Processes for Boeing Research & Technology (Seattle, Wash.), and her co-authors. For composite structures on commercial aircraft, the most often cited of these documents is AC 20-107B “Composite Aircraft Structure,” issued jointly by the Federal Aviation Admin. (FAA, Washington D.C.) and the European Aviation Safety Agency (EASA, Cologne, Germany). It describes three options for certifying damage tolerance of structures with bonded joints. (These options are listed, with explanatory comments, in the table at right).
Blohowiak, et. al., noted that, to date, no method of nondestructive testing/inspection (NDI/NDT) has demonstrated the capability to quantify the long-term strength and durability of bonded joints. They also noted that proof testing of each critical bonded joint on every new aircraft (application of the limit design load to verify that the bond does not fail) would be prohibitively expensive. Today, that effectively eliminates from consideration two of the three. That leaves one option: “prevention by design features.” Historically, mechanical fasteners through the bondline thickness (a/k/a “chicken rivets”) have been the design feature of choice.
However, Blohowiak and her co-authors point out that bonded joints without fasteners offer advantages beyond eliminating the purchase and installation of hardware. Without fastener holes, component thickness can be reduced, more efficient load paths are possible and thousands of stress concentrations, which can become points of origin for fatigue and related deterioration, are removed. And their removal can lead to significant additional savings in weight and greater airframe structure optimization. As their SAMPE paper asserts, bonded structures are, indeed, one path “to improve efficiency and reduce assembly cost in future advanced composite aircraft.” It seems plausible that they may also improve composites’ competitiveness vs. future metals technologies, such as high-strength aluminum alloys.
Coordinated approach to certification
Blohowiak’s paper is the result of five years of Boeing-funded research in pursuit of “suites of technology to increase the reliability of adhesive bonded structures, not structure- or aircraft-platform-specific, but rather looking at the subject broadly.” The goal, she emphasizes, “is to be able to develop best practices in design, testing, process control and quality assurance, which we can then update for industry-wide use, for example in the CMH-17 standard.” (CMH-17 is the Composite Materials Handbook, which is maintained by a volunteer organization of nearly 200 industry members.)
Airbus, too, has been researching bonded primary structures for a long time. Thomas Kruse, Airframe Design Research & Technology for Airbus Operations (Hamburg, Germany) and work package leader for next-generation bonding technologies, presented “Bonding of CFRP Primary Aerospace Structures,” at the 2013 CFK Valley Stade Convention (June 11-12, Stade, Germany) and the 19th International Conference on Composite Materials (July 28-Aug 2, Montreal, Quebec, Canada).
Both Boeing and Airbus have identified the need for technology development in several areas that, if realized, could be used to establish a certification process: design, material and process qualification, process control (termed process safety by Airbus), and NDI/NDT methods for quality assurance. Beyond these is the issue of durability testing, which shows that the joint does not fail after repeated loading (fatigue) and under the typical in-service conditions (e.g., fluid exposure, and temperature and humidity cycling).
Kruse points out that Airbus can effectively address two of the four critical cases for bondline failure: delamination and assembly-related disbond. “For a delamination or disbond caused during manufacture, we can find these via the final QA check, for example, using large-scale ultrasonic [UT] C-scan. We prove every component on Airbus aircraft using these types of technology. Thus, the two limiting factors for composite bonded joints are the weak bond, which we cannot find, and damage in service, which is beyond our control.”
Design and sizing
Kruse asserts, “Design and sizing is the only thing we can really do for both weak bonds and in-service damage.” Sizing here refers to the process of designing and optimizing the size of structural components, laminates, joints and features (e.g., fasteners or alternatives). Mechanical fasteners within bonded joints are thought of in two ways: as a redundant load path and as a means to prevent disbond from growing, Kruse explains, noting that “the rivet acts as a second load path so that the joint is still able to carry limit load even if the whole bondline fails.”
Kruse reports that BOPACS is researching both aspects, investigating whether a rivet can function as a crack-arresting feature. “The typical fasteners used today do not help arrest crack development in all cases,” he points out. Therefore, BOPACS’ two main objectives in this area are to develop new, more efficient disbond-arresting features and to gain a fundamental understanding of crack growth and crack arrestment. “A first step is to reduce the number of fasteners and the second is to eliminate fasteners to fully exploit the advantages of composites.” However, Kruse says this technology is still a long way from implementation.
Boeing also is pursuing this fundamental understanding and seeking closed-form analysis methods for sizing and substantiation of crack-arresting features. When asked about the use of computer simulation for certification of such features, Matt Dilligan, senior structural analyst, and Marc Piehl, technical fellow, both part of the Applied Structural Methods & Tools group, replied that Boeing already uses fracture-based analytic methods to support current composite structure certification and is pursuing closed-form analytic tools to efficiently size and substantiate the damage-arrest capacity of fasteners and other damage-arrest features. Blohowiak adds, “We are investigating if we can reduce the number of fasteners.”
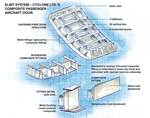
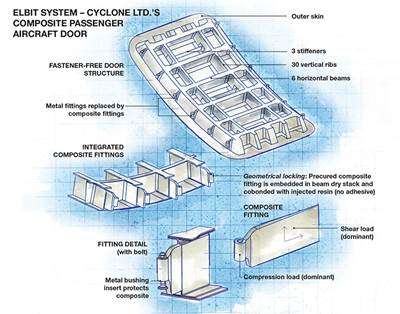
Toward that end, both Boeing and Airbus are exploring alternative ways to achieve redundant load paths. One option, says Kruse, is “geometrically locking some of the plies in the structure.” An example of a similar idea, although it relies on co-cured structure, is the fastener-free aircraft passenger door (see “Learn More”) developed by Karmiel, Israel-based Cyclone Ltd., a subsidiary of Elbit Systems – Cyclone Ltd. (Haifa, Israel). But this technology has not yet been certified on an aircraft.
Kruse gives another example: “BOPACS is trying to achieve this interlocking with two cured components, which is very challenging but mandatory when facing secondary bonding. Different generic principles will be investigated, including bondline surface and geometry modification. There is a concept where the joint design features a type of corrugation that prevents the substrates from pulling apart and redirects a potential crack out of plane.”
He notes that the BOPACS project also is looking into bondline architecture, including modification of the stiffness and other properties of the adhesive to redistribute energy passed into the bondline. An example is alternating tough and brittle layers. But, Blohowiak notes, “How you are able to design these alternative crack-arresting features is very dependent on the type of structure.”
Proving the whole by proving the pieces
Just as laminates within a composite structure rely on materials and processes, so do bonded joints. Thus, qualification must be of the whole system: laminate fiber, laminate matrix, surface preparation, adhesive, cure and also processing materials, such as peel ply, which can have a direct effect on bond strength.
Qualification of the entire system, however, must be preceded by developmental efforts in each individual subsystem. These subsystems are also targeted at preventing and/or identifying a weak bond. One example is outlined in the SAMPE 2013 paper, “Composite bond process surface preparation: Qualification of the no-bolt bond line,” by Michelle J. Palmer, senior materials engineer at Lockheed Martin Aeronautics. She describes the progress of the DARPA-funded TRUST Program, the objective of which “is to prove the ability to quantify and predict bond reliability.”
“To do this,” Palmer explains, “we must start by using a quantifiable, consistent surface preparation.” One candidate technology is plasma treatment. “An automated application of atmospheric plasma to chemically activate composite faying surfaces [those in contact in a joint] would meet these requirements, and implementation in the composite bonding process could make inspection and quality-assurance methodology more manageable, reducing risk and cost.”
According to Palmer, TRUST has collected data from roughly 900 plasma test coupons to compare current baseline surface preparation methods with various processes that incorporate atmospheric plasma treatment, using equipment from Surfx Technologies LLC (Redondo Beach, Calif.). TRUST will present 10 papers at SAMPE Tech 2014 (June 2-5 in Seattle, Wash.), three of which are on plasma, including a second paper by Palmer that will review plasma treatment qualification results. Similar work is ongoing or must be done for each system component.
Developing technologies for process control
Process control is another key plank in building a certification system. Blohowiak and her Boeing team have outlined a suite of potential process control technologies that include the following:
• Fault Tree Analysis — Mapping the bonding process from beginning to end to determine where and what type of quality checks are required.
• Bayesian Networks — These and other applied math tools provide a systematic assessment of bonding process reliability.
• Inline quality control tools (e.g., NDI and NDT methods) to validate composite surface preparation before bonding. The integration of these would enable a modeling capability that could provide a quantitative assessment of process reliability for a given bonded structure.
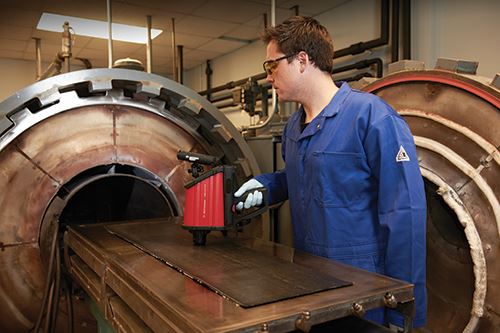
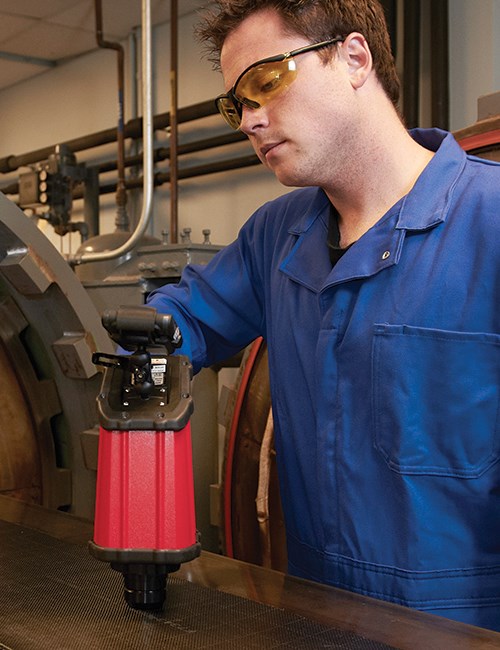
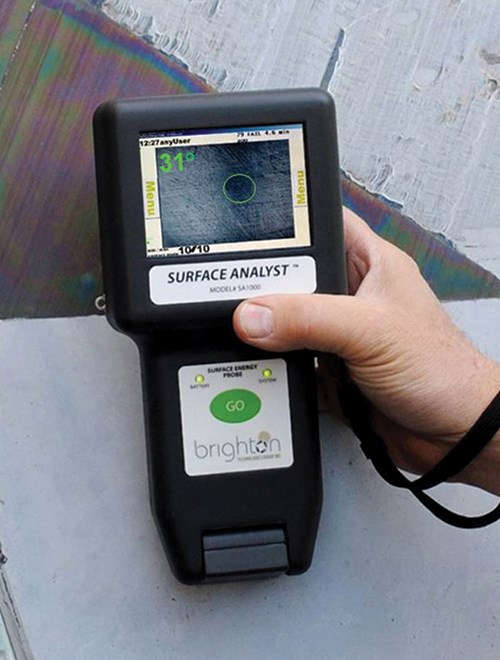
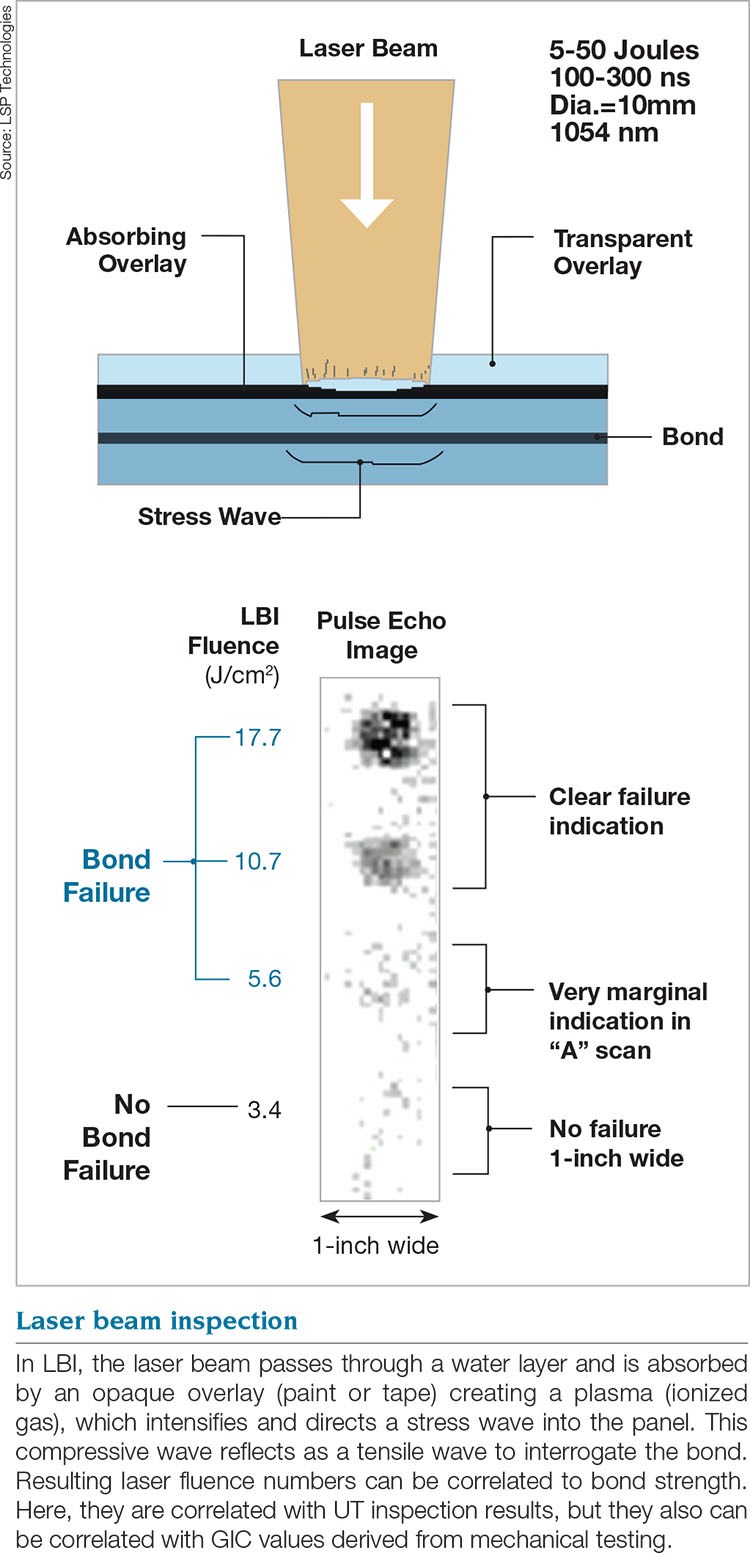
How does this look on the manufacturing floor? “We are looking at computer vision tools — quality assessment and control through computer vision inspection — that would walk a user through each step in the bonding process,” says Blohowiak. “After sanding, how do I determine that the surface has been activated sufficiently? This is where a contact angle measurement or FTIR tool (see "NDI and NDT methods for process control," at the end of this article or click on its title under "Editor's Picks") could be used to evaluate the surface, returning a quantitative value for acceptance level and control charting. For example, the user inputs a contact angle measurement of 44˚. The computer compares that to the process specification and responds to proceed or to repeat the surface prep,” she says. “At the end, there is a postcure inspection to see if I did it all correctly. Laser bond inspection (LBI) is a technology being explored for this final step.”
Kruse says Airbus research into LBI and contact angle measurement continues to be part of its final certified bonding process as well, but contends that verification of process safety [process control] is not included in AC20-107B requirements for certification. “Even if we achieve 100 percent process safety, this regulation says we still cannot bond a primary structure without other measures. It does not solve the problem immediately.” He concedes that if the industry can use process control systems to demonstrate that bonding is safe for many years, then it may defuse the issue, but he sees this as a long-term process. He questions if a greater return would be achieved by investing more in design and NDT/NDI combined with structural health-monitoring technology because these would also address the issue of in-service damage, which cannot be solved with process control alone.
Blohowiak maintains that over time, applying the type of coordinated certification system her team has outlined for every bonded system would ensure progress toward the goal of increasing reliability in bonded primary structure, so that the industry could increase its use in composite airframes. “This is why we looked at inline control tools that offered near-term maturation.”
Correlating control to reliability
Kruse points out that AC20-107B requires “repeatable NDI that ensures the strength of each joint.” HPC interviewed the NDT technology suppliers included in the process control outlined by Blohowiak and her teammates. Although none described their methods as a direct proof test equal to destructively loading a bonded joint to failure, each is pursuing correlation of their test results with mechanical properties testing. The resulting correlation may provide a statistical basis for predicting bonded-joint strength and reliability. Each bondline’s strength may not be 100 percent predictable, but its variation could be quantified, which might then be addressed using intelligent design methods
David Lahrman, VP of business development for LBI technology company LSP Technologies Inc. (LSPT, Dublin, Ohio) admits that, with LBI, “we cannot convert a laser fluence level [the amount of energy per unit area] to an absolute bond strength value. However, one can inspect several test points on a panel — say one for every 1-inch square — and obtain a statistical number, let’s say 20 J/cm2 ±0.10.” He adds that subsequent mechanical testing then could correlate a laser fluence (J/cm2) to a strength property (N/cm2). “One can conduct LBI measurements on controlled full-strength and weak-bond specimens and then generate strength data from double cantilever beam and other tests.”
“Quantitative prediction of reliability in bonded joint adhesion requires a certain total number of measurements,” says Giles Dillingham, president and chief scientist at Brighton Technologies Group (BTG, Cincinnati, Ohio). This is because all of the NDT methods under study, thus far, take discrete point measurements. “We are developing this data and correlation to long-term bond performance.”
The correlation process he describes is basically the same as that reviewed above for LBI. He believes that contact angle measurement and FTIR can be used together, along with other tools, “to ensure every part of the composite structure manufacturing process builds quantifiable reliability.”
Another example is a study by Agilent Technologies (Santa Clara, Calif.) using its Fourier Transform Infrared (FTIR) Spectroscopy technology to correlate the parameters of plasma treatment (as a means of surface preparation) to bond strength. Specifically, Agilent used its ExoScan Surface FTIR tool to evaluate a CFRP surface where the distance from the plasma head to the surface was varied. Resulting under-, over- and optimally treated surfaces were then bonded and cantilever beam tested to determine GIC values — that is, the force required to peel the adherends apart and, thus, a direct bond strength measurement. Seelenbinder notes, “We were able to correlate the FTIR measurements to the bond strength and define the optimum distance of the plasma head.” Agilent will give a presentation on this work at JEC Europe (Mar. 11-13, 2014 in Paris, France).
The ability to inspect a bondline and substantiate that its strength falls within a certain allowable range is one thing. Predicting its long-term durability in service is another. Blohowiak and her team have made headway in this area, however. She explains that her team has developed accelerated test methods that enable evaluation of long-term performance in less than two weeks vs. the traditional 9 to 10 months. This paper was presented at SAMPE 2013 as well, reviewing the 2-ply coupon method and its results, which correlated well with the more time-consuming, traditional 10-ply coupon methods. “We are now developing a palette of such test methods,” she adds, “and will feed these into the CMH-17 and other standards.” Coordinated with the type of correlation described above and the systematic use of design, qualified processes and process control, it seems that definite increases in bonded structure reliability are achievable. The issue then, becomes scale and actual implementation.
Automating the paths to implementation
Implementing this type of process control system requires automating the various inspection tools. Through an National Science Foundation (NSF)-funded program, BTG has developed a prototype robotically deployed contact angle measurement sensor that could be attached to the same robot head as a plasma treater. He details, “It would be possible to plasma treat as a means of surface preparation and immediately perform contact angle measurement to get real-time feedback on whether the surface is ready for bonding.” Seelenbinder relates that Agilent, too, has developed more automated 4100 ExoScan FTIR applications, where the inspection head is mounted to a CNC-machine. This enables measurement without contacting the part surface and could easily be modified for use on a robotic arm.
Now it is a matter of refining sampling methodologies, data correlation and how to use the various design, process (e.g., surface treatment) and control tools as an integrated system. According to Richard Bossi, senior technical fellow at Boeing R&T and co-author of the 2013 SAMPE paper, “The next step is to do a demonstration on a secondary CFRP structure starting with design and use the process outlined with a view toward certification.”
Changing the aerospace certification culture
“The more we can use adhesive bonds, the lighter we can make structures,” summarizes Blohowiak, but cautions, “There is a big cultural change that has to happen. There has to be assurance that we can do this (bond) reliably and repeatably.” She and most of the researchers involved in this endeavor think we will see a gradual increase in bonded primary structure in new aircraft. “But the technology also has to be ready when the next platform is being developed, regardless of whether it is commercial or military,” Blohowiak warns. She also sees that these issues should concern not only OEMs, but Tier 1 and material suppliers as well. “The whole supply chain has to be comfortable with what they can and can’t do.” Which is why Boeing, Airbus and Lockheed all agree that continuing this work and publishing the results is key to achieving composite airframes with fewer and fewer bolts.
Related Content
Cryo-compressed hydrogen, the best solution for storage and refueling stations?
Cryomotive’s CRYOGAS solution claims the highest storage density, lowest refueling cost and widest operating range without H2 losses while using one-fifth the carbon fiber required in compressed gas tanks.
Read MorePlant tour: Spirit AeroSystems, Belfast, Northern Ireland, U.K.
Purpose-built facility employs resin transfer infusion (RTI) and assembly technology to manufacture today’s composite A220 wings, and prepares for future new programs and production ramp-ups.
Read MoreA new era for ceramic matrix composites
CMC is expanding, with new fiber production in Europe, faster processes and higher temperature materials enabling applications for industry, hypersonics and New Space.
Read MoreWelding is not bonding
Discussion of the issues in our understanding of thermoplastic composite welded structures and certification of the latest materials and welding technologies for future airframes.
Read MoreRead Next
Cutting the cost of integrated composite aerostructures
A unitized all-composite aircraft door concept is realized in one shot with no fasteners.
Read More“Structured air” TPS safeguards composite structures
Powered by an 85% air/15% pure polyimide aerogel, Blueshift’s novel material system protects structures during transient thermal events from -200°C to beyond 2400°C for rockets, battery boxes and more.
Read More

